Introduction
Nowadays, bootstrapping Kubernetes clusters became monumentally simplified, especially with Terraform across many cloud providers and Kind and kubeadm for local. However, maintaining a bash script to initialise Kubernetes clusters with the basic infrastructure and monitoring components with Helm or Kustomize has been a huge challenge for me. For instance, it was nearly impossible to identify which cluster was with which version of ingress controller and so on.
Then I got to know GitOps founded by Flux from Weaveworks a while ago and I’ve been a big fan of it since the day I adopted it. The solution worked out quite nicely to resolve challenges around clusters consistency. All the modifications were recorded in GitHub.
Also, not having to expose the Kubernetes API server to CD was also a bonus to improve security.
However, the complexity of Kubernetes itself still remained. Developers with no Kubernetes background suffered from learning Kubernetes due to its complexity and needed a way to make it simplified. This is where Portainer comes to rescue. It is an open-source tool for managing container based applications across Kubernetes, Docker, Docker Swarm and Azure Container Instance (ACI) environments.
In this blog post, I will demonstrate how Terraform can be used to bootstrap a Kubernetes cluster in Azure, Flux to instate a list of infrastructure and monitoring Helm releases for a Kubernetes cluster and Portainer for application management.
Note: This blog post is based on Flux v1. GitOps Toolkit version will be released in near future. Likely to be covered during Flux v1 to v2 migration blog post
Walkthrough
Flux Repository
The following is how my base Flux repository is setup. This repository will be pointed by the Flux later on. You can find the details on my GitHub repository.
infrastructure
coredns-config.yamlto configure a custom DNS forwarder for my own domaincsi-release.yamlto integrate with Azure Key Vault and retrieve the secretskured-release.yamlto automatically apply OS patching for the AKS nodes every Saturday and Sundaypublic-ingress-release.yamlto provide ingress rules exposing HTTP/HTTPS web traffics in public
monitoring
monitoring-namespace.yamlto create a namespace including certificate and PVCs for Prometheus and Grafanagrafana-release.yamlto deploy a Grafana instance with Azure AD integration, an ingress rule with Letsencrypt TLS and an existing PVCloki-release.yamlto deploy Loki v2 with a storage account (S3 bucket version in Azure) for indexers and chunks persistenceprometheus-releaseto deploy a Prometheus instance with an existing PVCpromtail-release.yamlto deploy Promtail across all nodes for log collection
portainer
portainer-release.yamlto create a namespace and deploy Portainer
Bootstrapping Kubernetes
First thing first, a Kubernetes cluster will be required. In this walk-through, I will deploy an Azure Kubernetes Cluster with Terraform. The main.tf from the repository for the main AKS block is to enable:
- Managed Identity for service integrations such as Azure Container Registry
- Assign an Azure AD group with
ClusterAdminRole - Authorised list of IP addresses
- An Azure Blob Storage Account for Loki indexers and chunks
Once Terraform apply finishes, ensure to update the Loki’s storage_config section with the right storage account access key.
Finally, deploy Flux & Helm Operator Helm charts. Below is an example of what I use:
az aks get-credentials -n kubernetes -g kubernetes-rg

helm repo add fluxcd https://charts.fluxcd.io
kubectl apply -f https://raw.githubusercontent.com/fluxcd/helm-operator/master/deploy/crds.yaml

kubectl create namespace flux
kubectl create secret generic flux-git-auth \
  --namespace flux \
  --from-literal=GIT_AUTHUSER=${flux_git_username} \
  --from-literal=GIT_AUTHKEY=${flux_git_token} \
  --from-literal=GIT_URL=${flux_git_url}

helm upgrade -i flux fluxcd/flux \
  --set git.branch='master' \
  --set git.url='https://$(GIT_AUTHUSER):$(GIT_AUTHKEY)@$(GIT_URL)' \
  --set env.secretName=flux-git-auth \
  --set helm.versions=v3 \
  --set registry.acr.enabled=True \
  --set additionalArgs={--sync-garbage-collection} \
  --set nodeSelector."beta\.kubernetes\.io/os"=linux \
  --set memcached.nodeSelector."beta\.kubernetes\.io/os"=linux \
  --namespace flux

helm upgrade -i helm-operator fluxcd/helm-operator \
  --namespace flux \
  --set nodeSelector."beta\.kubernetes\.io/os"=linux \
  --set helm.versions=v3
Give it a few minutes and voila! Running kubectl get pods -A, you will see all the infrastructure and monitoring components in running state!
NAMESPACE        NAME                                                              READY   STATUS    RESTARTS   AGE
csi              csi-secrets-store-provider-azure-rnbnt                            1/1     Running   0          10m
csi              csi-secrets-store-provider-azure-secrets-store-csi-driver-ptdqs   3/3     Running   0          10m
flux             flux-6f7d499555-ch2xw                                             1/1     Running   0          10m
flux             flux-memcached-64f7865494-s6bn2                                   1/1     Running   0          10m
flux             helm-operator-85b4584d6-5fwj2                                     1/1     Running   0          10m
grafana          grafana-787b494774-646tb                                          1/1     Running   0          10m
grafana          loki-0                                                            1/1     Running   0          10m
grafana          promtail-6z4pv                                                    1/1     Running   0          10m
kube-system      azure-cni-networkmonitor-8bndg                                    1/1     Running   0          10m
kube-system      azure-ip-masq-agent-wlhpj                                         1/1     Running   0          10m
kube-system      azure-npm-mgfws                                                   1/1     Running   0          10m
kube-system      coredns-79766dfd68-mjrb4                                          1/1     Running   0          10m
kube-system      coredns-79766dfd68-v8pkb                                          1/1     Running   0          10m
kube-system      coredns-autoscaler-66c578cddb-lstdm                               1/1     Running   0          10m
kube-system      kube-proxy-zwl4j                                                  1/1     Running   0          10m
kube-system      metrics-server-7f5b4f6d8c-74qg4                                   1/1     Running   0          10m
kube-system      tunnelfront-7867c54b79-h8ztm                                      1/1     Running   0          10m
kured            kured-r5zvr                                                       1/1     Running   0          10m
portainer        portainer-6bddd5c8bc-dqvq8                                        1/1     Running   0          10m
prometheus       prometheus-kube-state-metrics-6df5d44568-b6b4k                    1/1     Running   0          10m
prometheus       prometheus-node-exporter-mkwhv                                    1/1     Running   0          10m
prometheus       prometheus-server-674c9d8dcf-9xnct                                2/2     Running   0          10m
public-ingress   cert-manager-58c645fccd-sjjp5                                     1/1     Running   0          10m
public-ingress   cert-manager-cainjector-78fc9bb777-r7jt7                          1/1     Running   0          10m
public-ingress   cert-manager-webhook-7fdb9b4d7d-fcxzc                             1/1     Running   0          10m
public-ingress   public-nginx-ingress-controller-99f56948f-59l86                   1/1     Running   0          10m
public-ingress   public-nginx-ingress-controller-99f56948f-8cbcj                   1/1     Running   0          10m
public-ingress   public-nginx-ingress-controller-99f56948f-v7xk2                   1/1     Running   0          10m
public-ingress   public-nginx-ingress-default-backend-698d978b4b-lbkg5             1/1     Running   0          10m
Now we are ready to deploy applications in our brand new AKS cluster with Portainer.
Portainer
Now, as per our ingress rule, Portainer will be accessible over http://portainer.ssbkang.io. Setup the local admin access, perform the initial Kubernetes features configuration to meet your requirements and click Save:

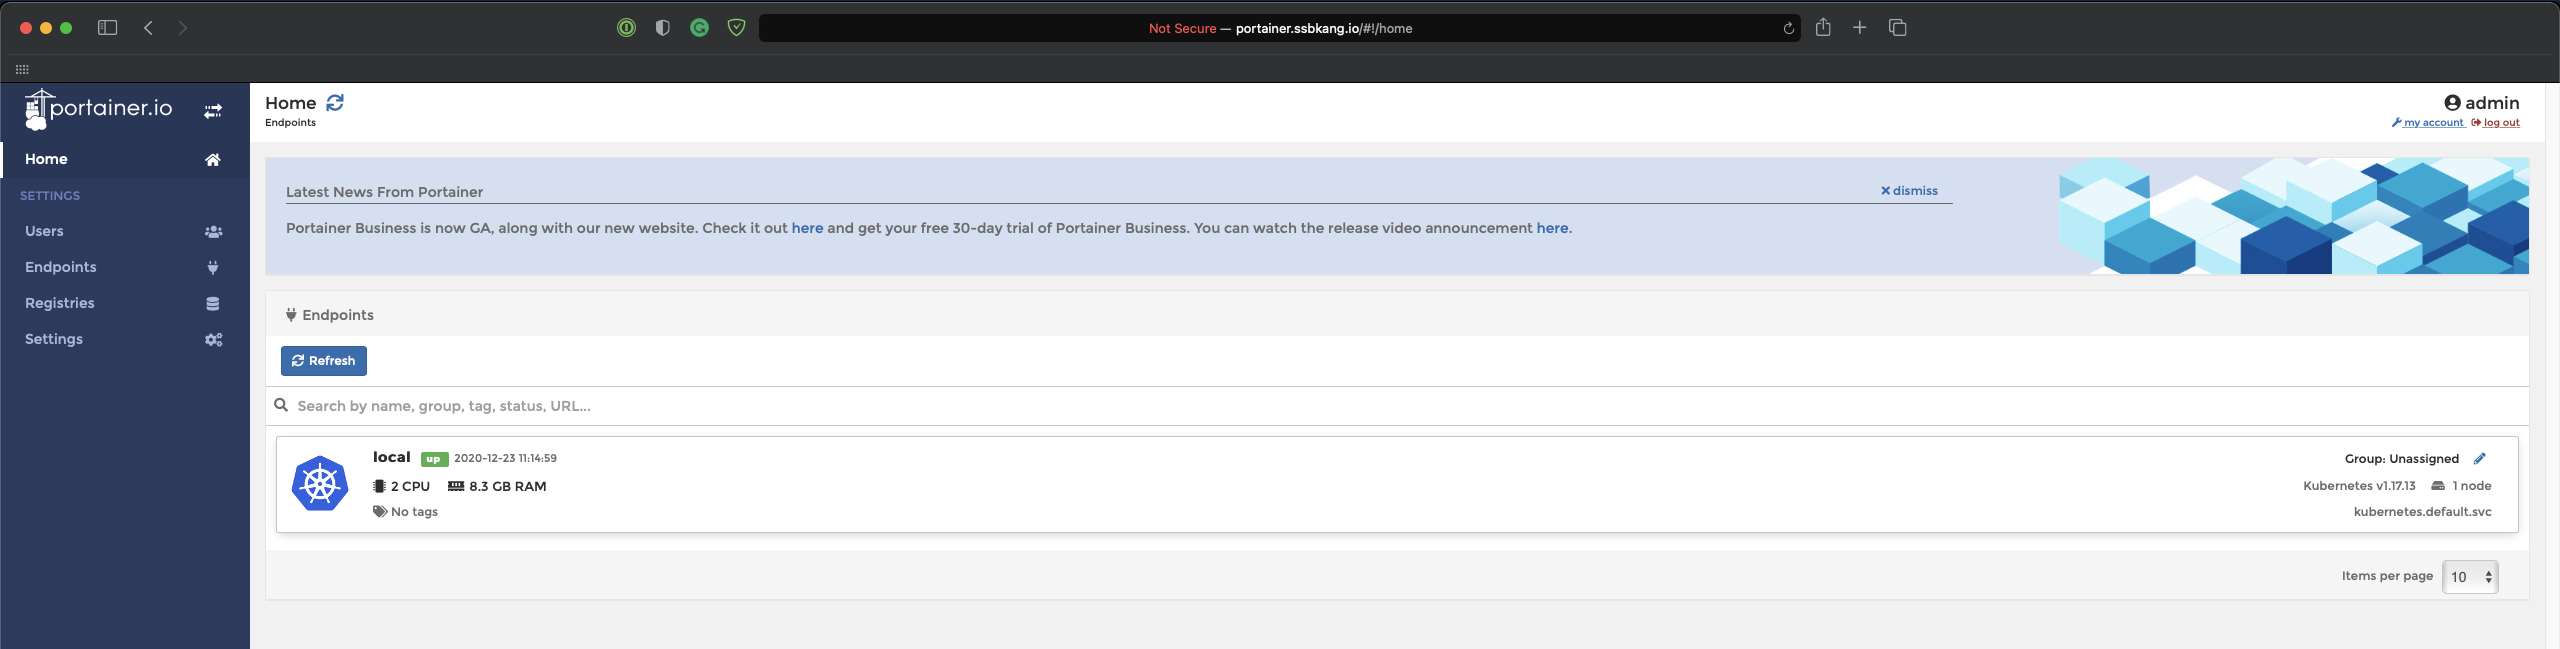
From Home, you will see the AKS instance. It is marked as local as Portainer is running locally inside the AKS cluster:
Navigate to the Cluster tab for more details around the Kubernetes nodes:

Navigating to the actual Kubernetes node visualises in-depth details:

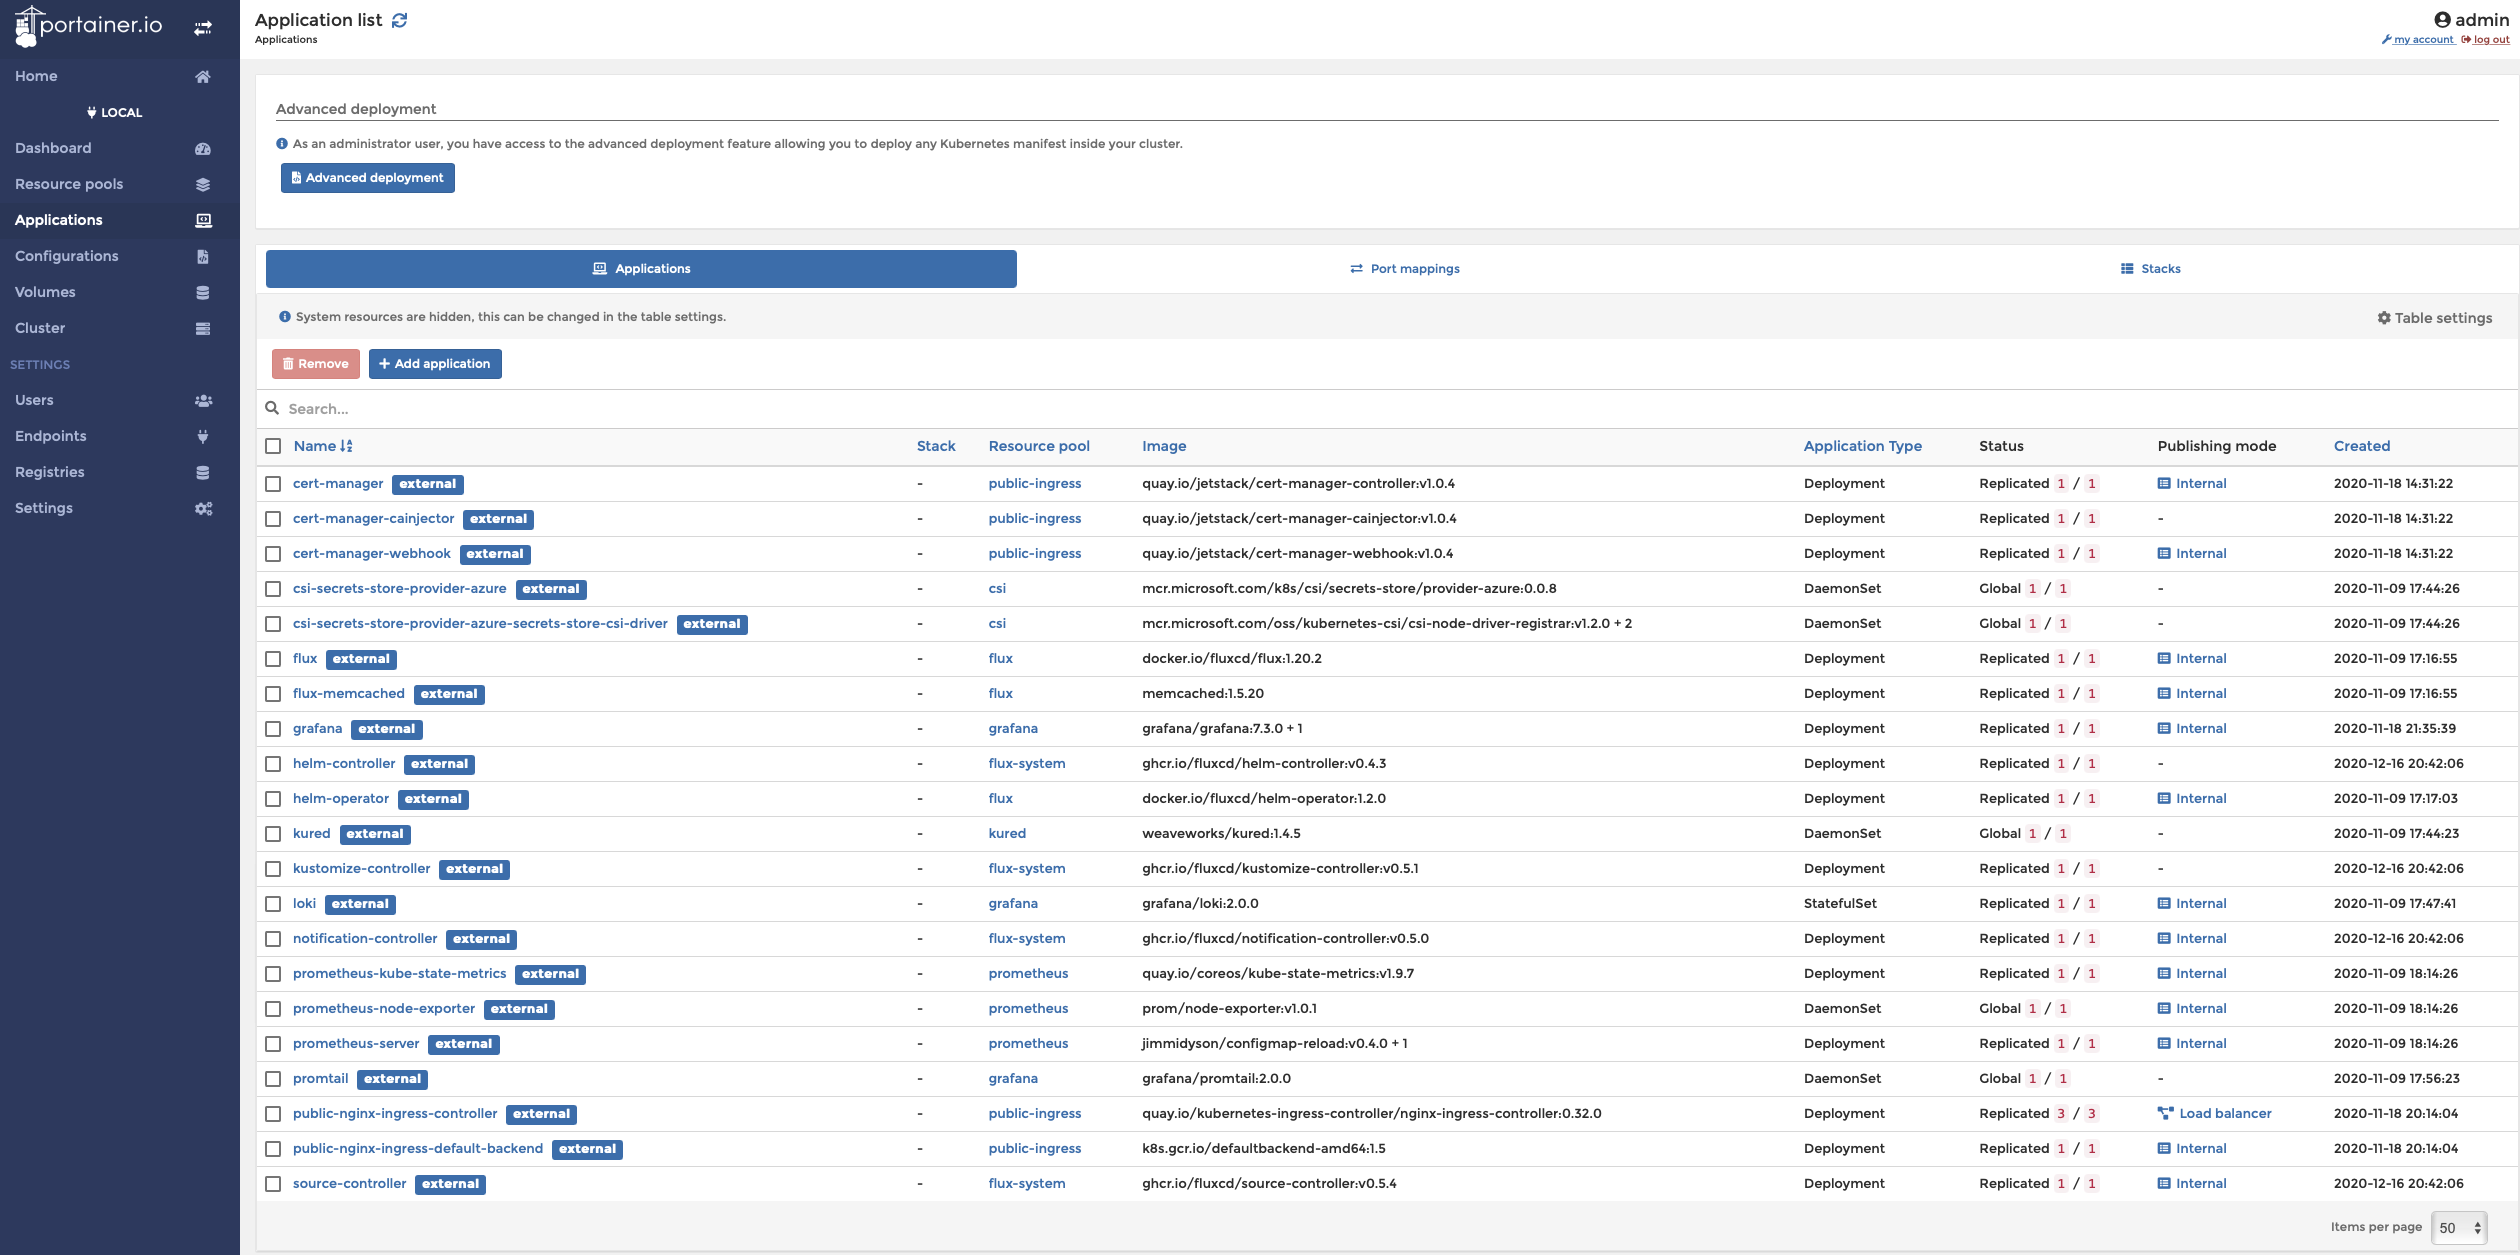
Portainer has translated few Kubernetes terms to be more generic. For instance, Resource pools to represent Kubernetes namespaces and Applications for deployments. The idea is to simplify the wording for users who are not familiar with Kubernetes terms and manifests.
Let’s deploy a sample application. In this blog post, I will be using Stefan Prodan‘s podinfo application.
First of all, we will need a resource pool. It can be configured to have resource limits, which is equivalent to ResourceQuota but translated into a nice UI. Also, this is where the user can enable ingress with a hostname associated:

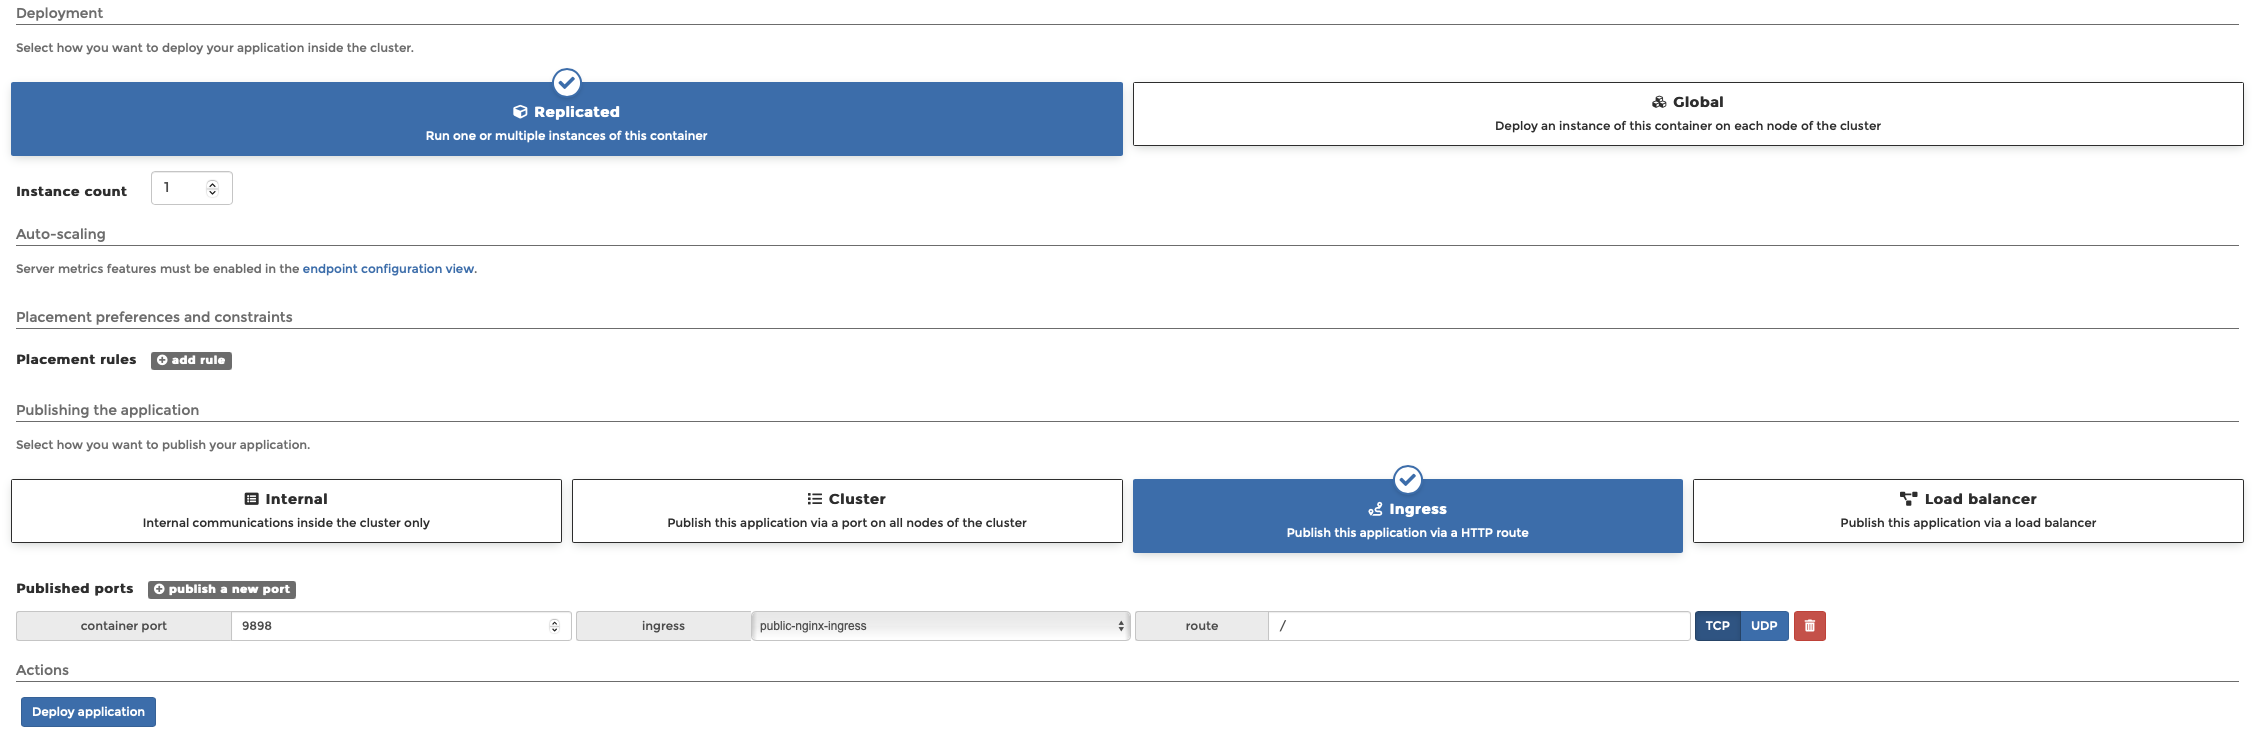
Inside the resource pool, the application will be created as per below:

Once deployed, I can then view the application status including the ingress endpoint:

Navigating to the endpoint URL, I can see my application running:

From this point, you will be able to manage this application in Portainer without having to know anything about Kubernetes manifests. This demonstrates a way to achieve yamlless deployment in Kubernetes!
Conclusion
In this blog post, I have walked through Terraform, FluxCD (GitOps) and Portainer to demonstrate the end-to-end Kubernetes setup including application management. As a DevOps or SRE, with this kind of a setup, you are ready to release a Kubernetes clusters for developers in a much more efficient and consistent way.
Hope this blog helped and for any questions or want clarifications, leave a comment! 😀
