vRO Deepdive Series Part 1 – Introduction

Introduction

Finally it’s here, deep dive series of vRealize Orchestrator (vRO), previously known as vCenter Orchestrator (vCO). The purpose of this series is to explain and discuss developing custom workflows to automate IT processes. My plan is to go through the following:

  • vRO Part 1 – Introduction
  • vRO Part 2 – Action & Workflow
  • vRO Part 3 – Presentation Layer
  • vRO Part 4 – Log Handling, Throwing Exceptions and Fail-back
  • vRO Part 5 – Introduction to Relationship Between vRO & vRA
  • vRO Part 6 – Integration of vRO & vRA

I won’t be going through how to install/configure vRO, there are many blogs out there for reference. Rather, I will be deep diving into development side.

In this blog post, I will be discussing:
  • Language to learn
  • Object and Type
  • Input, Output and Attribute
Let’s get started!

Language to learn

First of all, vRO is JavaScript based. So, if you are not familiar with this language, I suggest you to Google and read some basics with JavaScript, there are tons of resources out there!

Preparation

Before we start, let’s create a simple workflow for the exercises later:

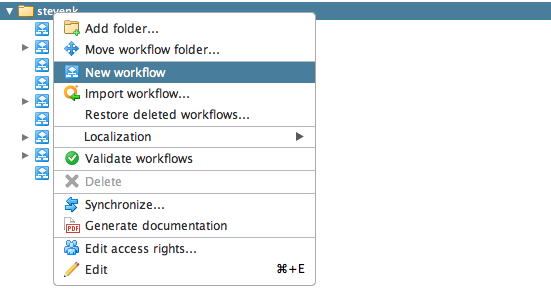
Login to vRO, right click on folder and create a workflow:

Screenshot 2015-03-12 11.31.11

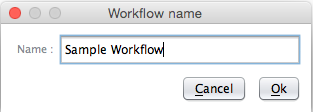
Name it Sample Workflow, or something you would like to name:

Screenshot 2015-03-12 11.31.18

Edit the workflow, navigate to Schema and between start and end, drag and drop a scriptable task:

Screenshot 2015-03-12 11.31.56

Navigate to Inputs tab and click Add parameter:

Screenshot 2015-03-12 13.37.10

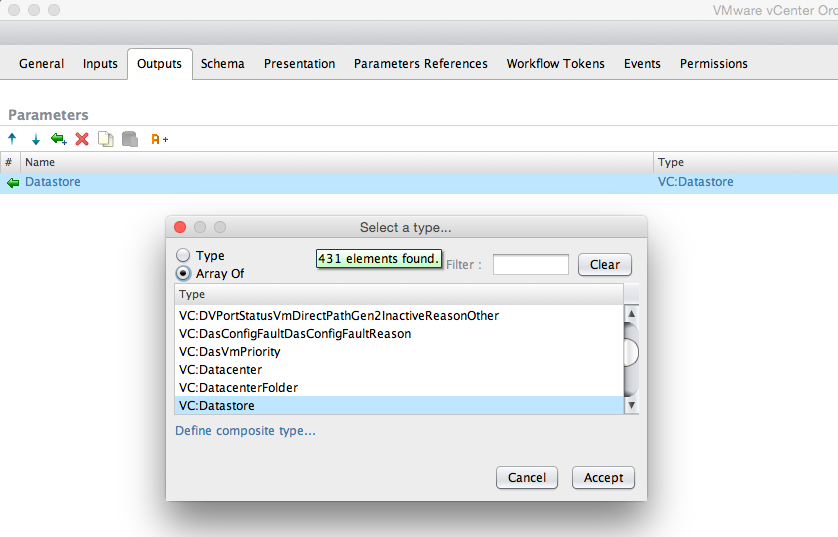
Name it VM and for the Type, search for VC:VirtualMachine and Accept:

Screenshot 2015-03-12 13.38.25

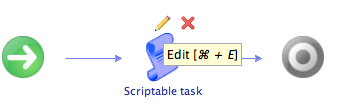
Go back to Schema, edit Scriptable Task and navigate to Visual Binding:

Screenshot 2015-03-12 13.54.04

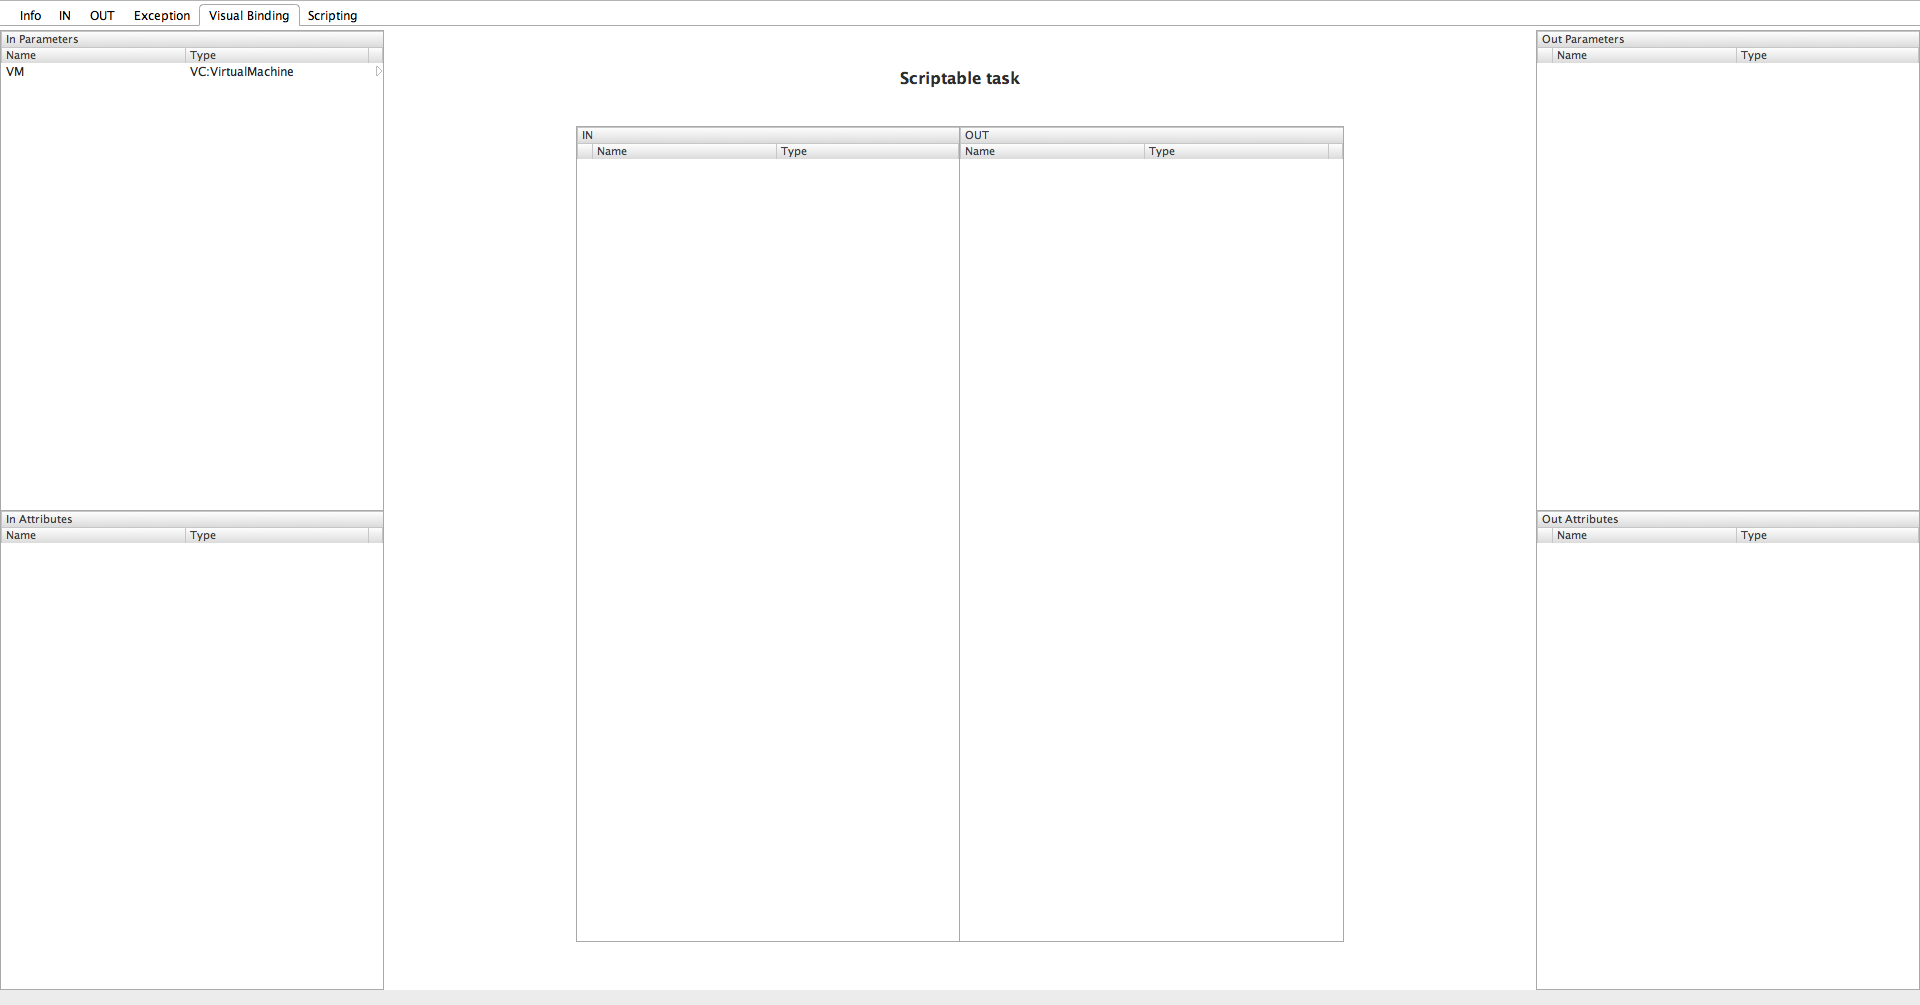
Drag VM and drop it in IN box:

Screenshot 2015-03-12 13.55.31

Save and Close. You can safely ignore the validation for now.

So everything’s ready, let’s get started!

Object & Type

Starting with definition of object:

A JavaScript object is an unordered collection of variables called named values

In vRO, there are lots of predefined objects VMware created, for example, VC:VirtualMachine and to develop a workflow properly, you must get familiar with objects. Let me make it clear with an example, go back to the workflow created above, click edit on the scriptable task and navigate to Scripting tab:

Screenshot 2015-03-12 11.33.40

Screenshot 2015-03-12 11.34.39

On the left hand above corner, you will see the list of APIs in the box. Let’s search for VC:VirtualMachine and click Go to selection:

Screenshot 2015-03-12 11.36.05

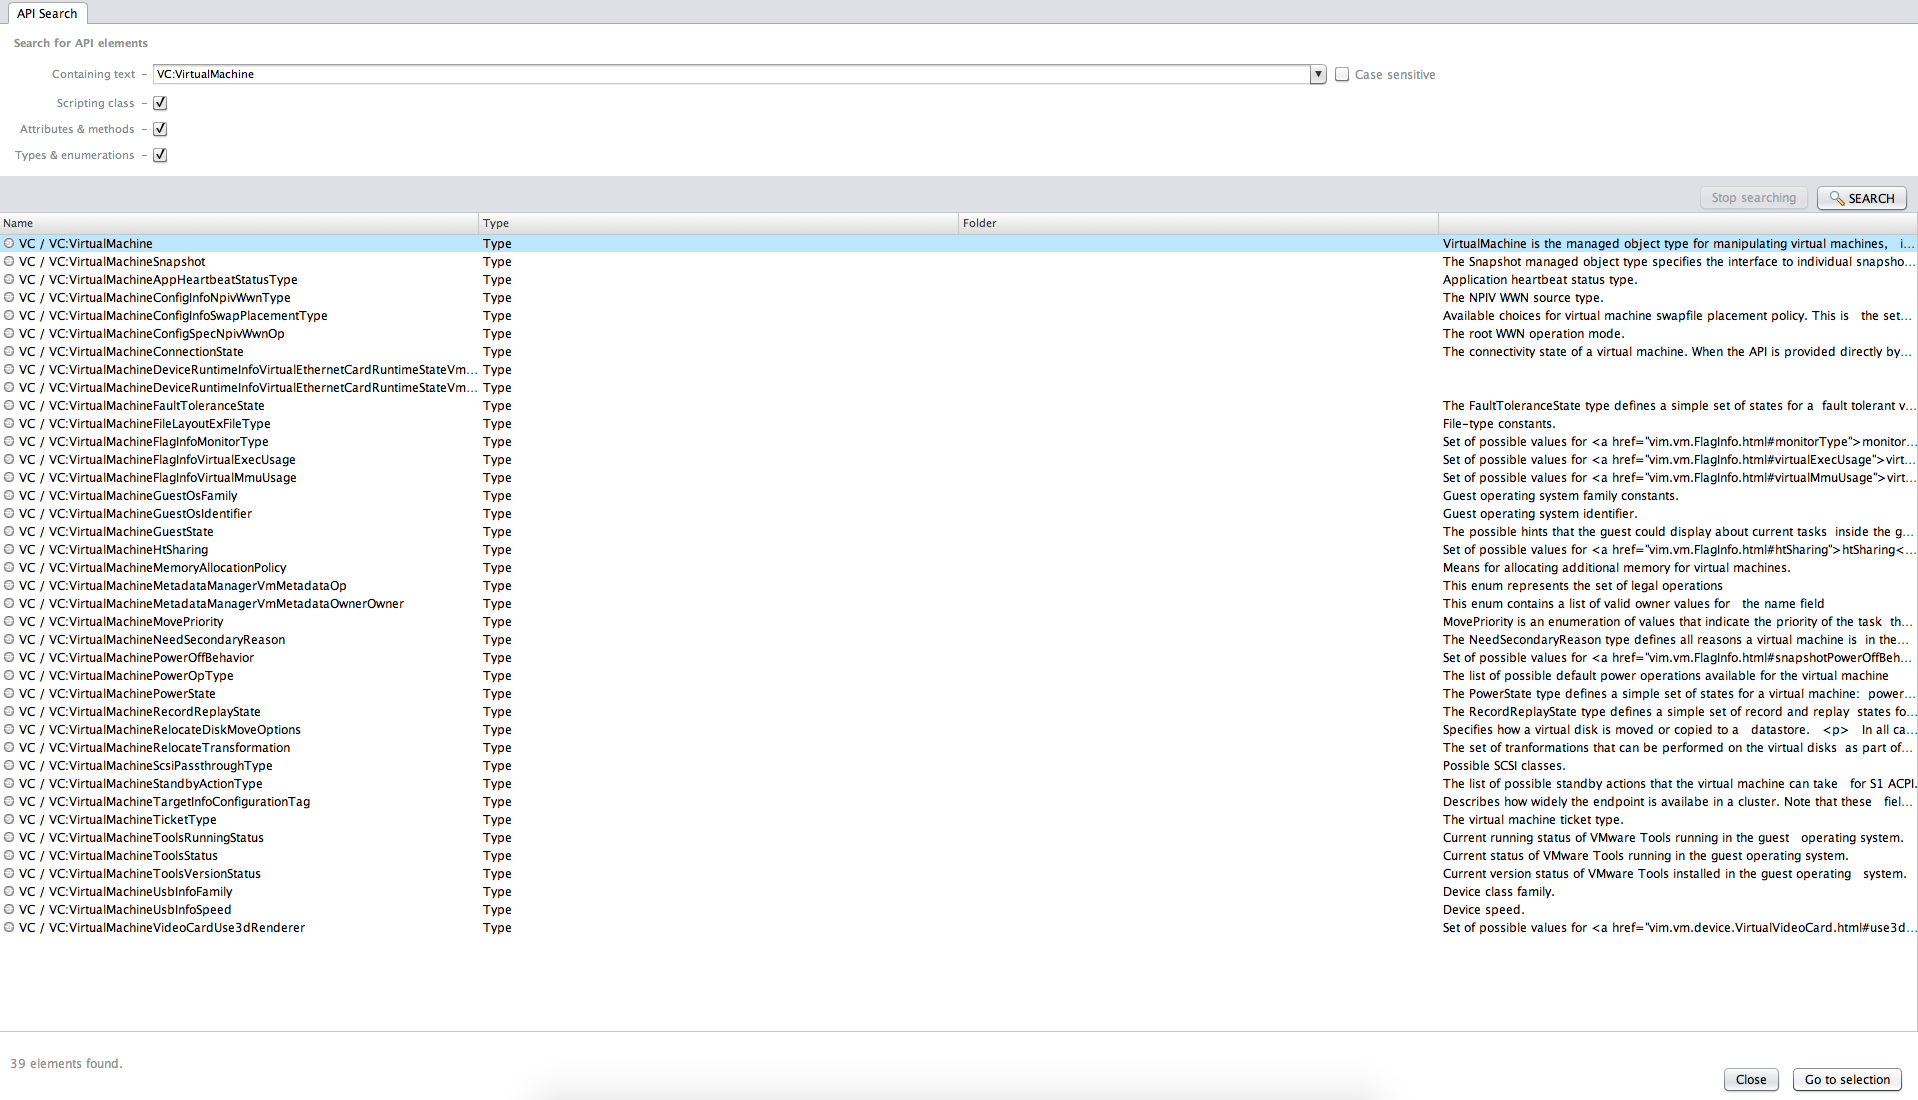
When you close the window, you will see:

Screenshot 2015-03-12 11.36.59

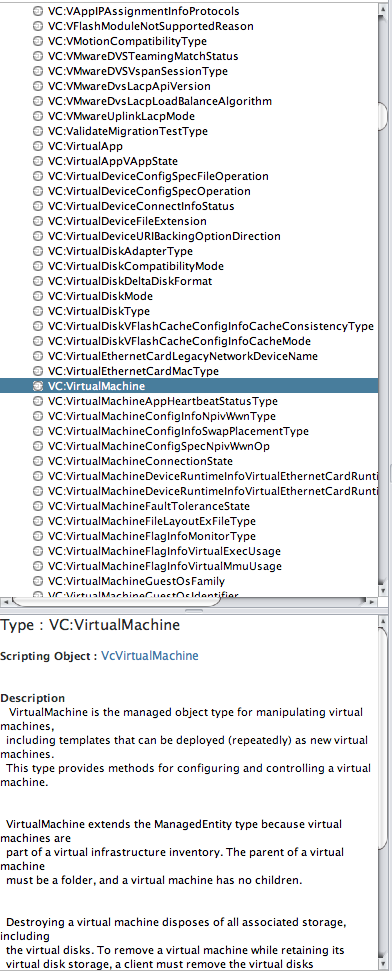
To view more details, click on VcVirtualMachine and expand:

Screenshot 2015-03-12 11.42.43

Now, you will see the list of all properties and functions and this is where you will have to search and read all the time. From the screenshot above, empty rectangles represent property, filled rectangles represent functions and literally these are the form of VCVirtualMachine object where the type is VC:VirtualMachine. You can either call property or function like the following:

  • Property => VC.datastore
  • Function => VC.destory_Task()

In summary, an object has a type of xxx which consists of properties and functions.

To view more details, you can click on any properties or functions. For example, let’s click datastore:

Screenshot 2015-03-12 11.50.52

One thing to note is, have a look at Return Type “Array of VcDatastore”. It means if you call for this property datastore, the return type will be Array of VcDatastore. I will be shortly going through type hence for now, let’s call some properties and output them on the log tab to see how they look like.

Edit the Scriptable task, navigate to Scripting tab and type System.log(VM.datastore);

Screenshot 2015-03-12 14.12.50

Before moving on, I would like to emphasise one thing. When you call properties, it’s case-sensitive meaning if you type “System.log(VM.Datastore)” it will fail to call datastore property as it doesn’t exist! Ensure you look at the API box on the top left hand corner and type exactly what it says.

It’s time to run the workflow. Right click, run and you will see the workflow asking for an input VM.

Screenshot 2015-03-12 14.16.36

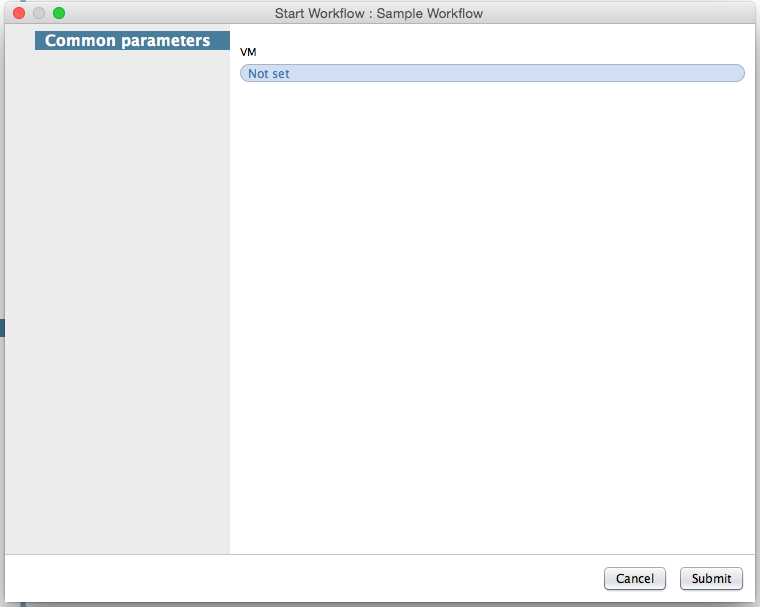
Click on Not set and select a VM and submit. Then, you will see VcDatastore type returned with the value which represents the name of datastore.

Screenshot 2015-03-12 14.19.04

It will output VMFS volumes being used by this VM. That was quite simple, wasn’t it? The reason I wanted to go through objects is when you start developing workflows or utilising other pre-built workflows, you must understand and use correct objects. I will give you an example. Let’s say administrator from CompanyA is trying to automate the following process:

  • Create a VM
  • Move the VM to resource pool
  • Power On

As there are already pre-built workflows available, he would want to use them instead of building from scratch. He created a workflow called “Custom VM Build” and put pre-built workflows into it. Then he will define 2 inputs for this workflow:

  • VM, String
  • ResourcePool, String

Then from Visual Binding, he will try and connect workflow inputs to pre-built ones and he will realise the operation is denied. The reason is simple, he hasn’t checked the inputs for 3 workflows above:

  • Create a VM (pre-built)
    • Input Type = VC:VirtualMachine
  • Move the VM to resource pool (pre-built)
    • Input Type = VC:VirtualMachine, VC:ResourcePool
  • Power On (pre-built)
    • Input Type = VC:VirtualMachine

Hence, he should have checked input types to match pre-built workflows’ inputs from the beginning. Make sure, know which objects with types you are planning to use, this looks very basic but this is the most important aspect.

Alternatively, he could have still used String inputs but then, extra scriptable task or action is required to convert String to either VC:VirtualMachine or VC:ResourcePool type. This will be discussed in the next series.

Input, Output and Attributes

Input

Time to look into inputs, outputs and attributes. Inputs and outputs are simple to understand, literally they are inputs and outputs to a workflow. Let’s re-cap the example above, I added an input called VM, VC:VirtualMachine to the Sample Workflow and this asked me to specify a VM when I ran it. The workflow prompts to ask users to put down inputs before running a workflow.

One thing to note is that the above statement doesn’t mean you must specify input value to run a workflow. I will show you why, go back to Orchestrator Client, edit Sample Workflow and navigate to Inputs tab:

Screenshot 2015-03-17 11.54.56

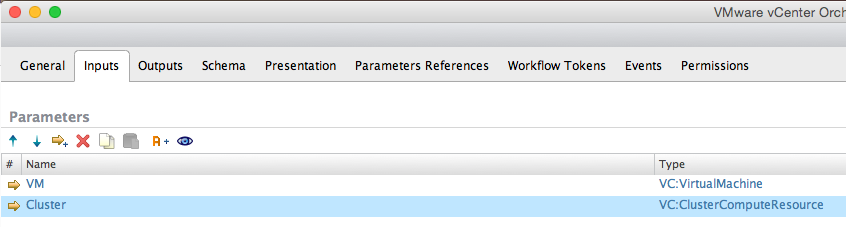
Create one more input called “Cluster” and type to be “VC:ClusterComputeResource”:

Screenshot 2015-03-17 11.54.47

Save and Close, ignore the warning.

Now when you run it, the workflow will ask you to write down VM and Cluster:

Screenshot 2015-03-17 11.57.04

Remember, the scriptable task in this workflow only looks for VM input and calls datastore property, i.e. System.log(VM.datastore). This means whether you specify Cluster value or not, it has no impact to the workflow. OK, why would you want to do this? I will give you another scenario.

Administrator from CompanyA wants to develop a workflow that allows the users to look for datastore(s). For the inputs, he/she wants to ask users to specify either VM or Cluster.

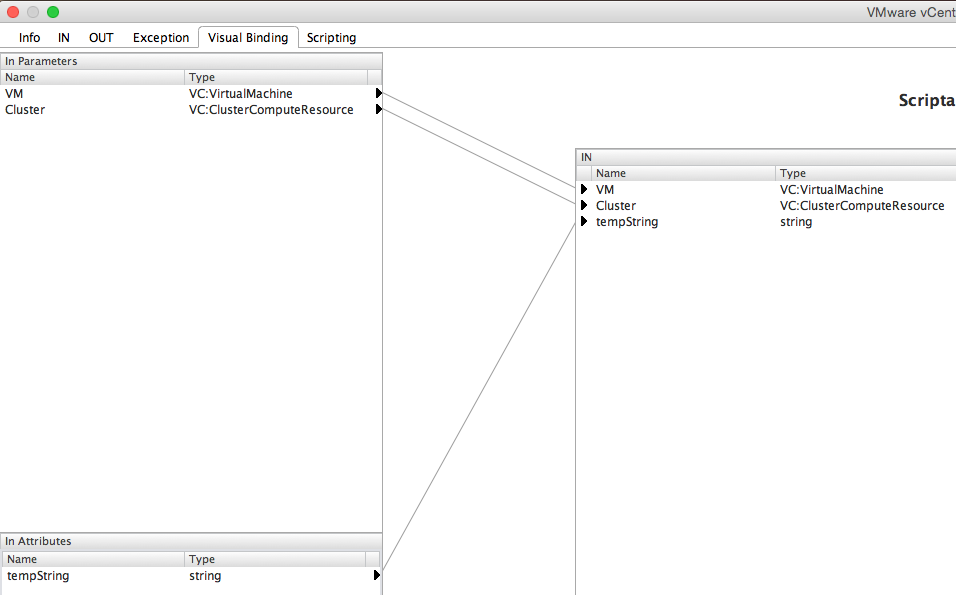
Assuming you created an input Cluster, navigate to scriptable task, Visual Binding tab and drag and drop Cluster to this:

Screenshot 2015-03-17 12.02.59

Go to Scripting tab and type the following in:

if (VM && Cluster) {
    System.log("Please specify either VM or Cluster");
} else if (VM) {
   System.log(VM.datastore);
} else if (Cluster){
   System.log(Cluster.datastore);
}

What this scriptable task does it:

  • If VM and Cluster specified, it asks the user to specify either VM or Cluster
  • If VM is specified, outputs datastore(s) attached to this VM
  • If Cluster is specified, outputs datastore(s) attached to this Cluster
 Running the workflow specifying Cluster only:
Screenshot 2015-03-17 12.08.21
Screenshot 2015-03-17 12.09.18
Specifying both VM and Cluster:
Screenshot 2015-03-17 12.11.48

Output

Next bit will be output. Once more, refer to the above example. This time, rather than displaying output directly, I am going to save the datastore property to an output.

First of all edit the workflow, navigate to Outputs tab and create an output parameter called Datastore with Array of VC:Datastore type:

Screenshot 2015-03-17 14.18.24
Then at Visual Binding tab, connect drag and drop Datastore to Out as per below:
Screenshot 2015-03-17 14.18.51

Edit scriptable task and modify the existing script to the following:

if (VM && Cluster) {
     System.log("Please specify either VM or Cluster");
} else if (Cluster) {
     Datastore = Cluster.datastore;
} else if (VM){
     Datastore = VM.datastore;
}

OK then you will say how do I output Datastore? The thing is, this output is the output of this workflow meaning, you will need to create another workflow and use this output as an attribute. An example will be provided in the next series for now, let me start discussing attributes.

Attribute

What is attribute? I personally want to call it “global variable” which can be defined in the beginning or set during workflow run. The reason I want to call it global variable is because when a value is given to it, it could be used anywhere within a workflow. So in summary:

  • Attribute could be pre-defined, i.e. input to a workflow
  • Attribute could be defined by a scriptable task, i.e. output to a workflow

Time for exercise!

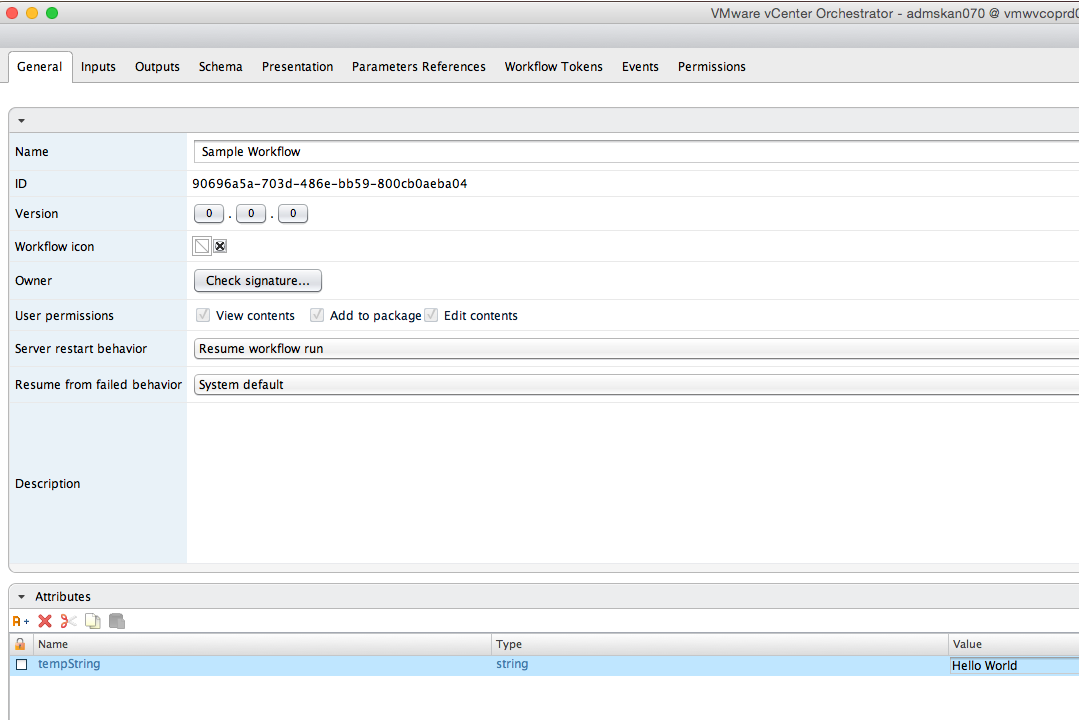
Edit the workflow, navigate General tab and click Add attribute:

Screenshot 2015-03-17 14.53.48
Call it tempString and leave the type to string:
Screenshot 2015-03-17 14.54.15
Go to Schema tab, navigate to Visual Binding and you will see tempString is available on both In/Out:
Screenshot 2015-03-17 14.55.31
This time let’s try in attribute. Drag and drop tempString into input:
Screenshot 2015-03-17 14.59.31

As mentioned earlier, the value for input attribute should be pre-defined otherwise the default value will be ‘’, which is null!

Close the window, navigate to General tab and type in “Hello World” in value tab:
Screenshot 2015-03-17 15.02.47
Then go back to scriptable task and type the following in:
System.log(tempString);

And running the workflow will give you the following:

Screenshot 2015-03-17 15.03.51

The exercise we’ve just went through shows you how to pre-define an attribute and output it in the workflow. In this case, the attribute is set to “Hello World” type to String and it could be called anywhere within this workflow. Literally, you can create 10 scriptable tasks and use this value in all of them.

Next one will be output attribute, where you can give a value to it within the workflow.

Edit the workflow, go back to scriptable task, navigate Visual Binding and disconnect tempString:
Screenshot 2015-03-17 15.08.00
And remove tempString from Input:

Screenshot 2015-03-17 15.08.14

Next one will be migrating an output parameter to attribute. Instead of creating an attribute manually, you can always migrate an existing input or output parameters to attributes. Go to Outputs and click on attributes which will automatically move output to an attribute:

Screenshot 2015-03-17 15.12.38

Screenshot 2015-03-18 11.23.16

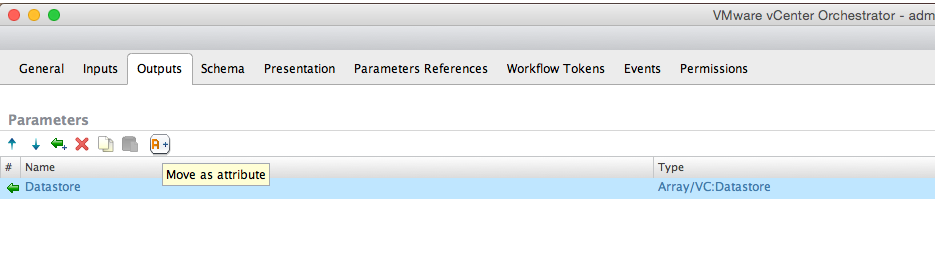
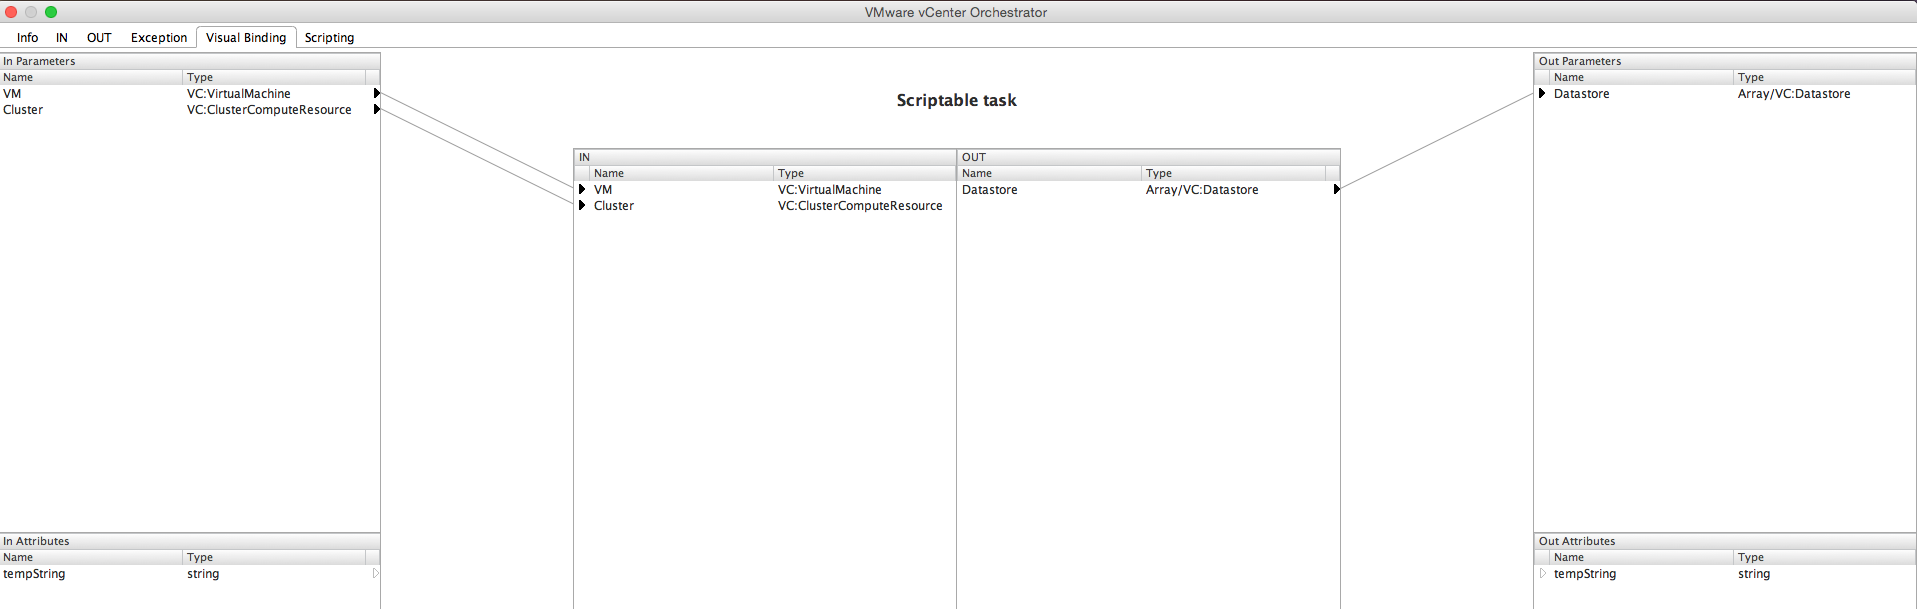
You will see Datastore is now moved to attributes. Go back to scriptable task, navigate to Visual Binding tab and drag and drop Datastore to Out box:

Screenshot 2015-03-17 15.13.22

Then add the following in at Scripting field:

if (VM && Cluster) {
     System.log("Please specify either VM or Cluster");
} else if (Cluster) {
     Datastore = Cluster.datastore;
} else if (VM){
     Datastore = VM.datastore;
}

Let’s go back to this statement above:

The thing is, this output is the output of this workflow meaning, you will need to create another workflow and use this output as an attribute.

This time, rather than saving Datastore as an output of the workflow, now the output is from a scriptable task. This means it could be used anywhere within this workflow.

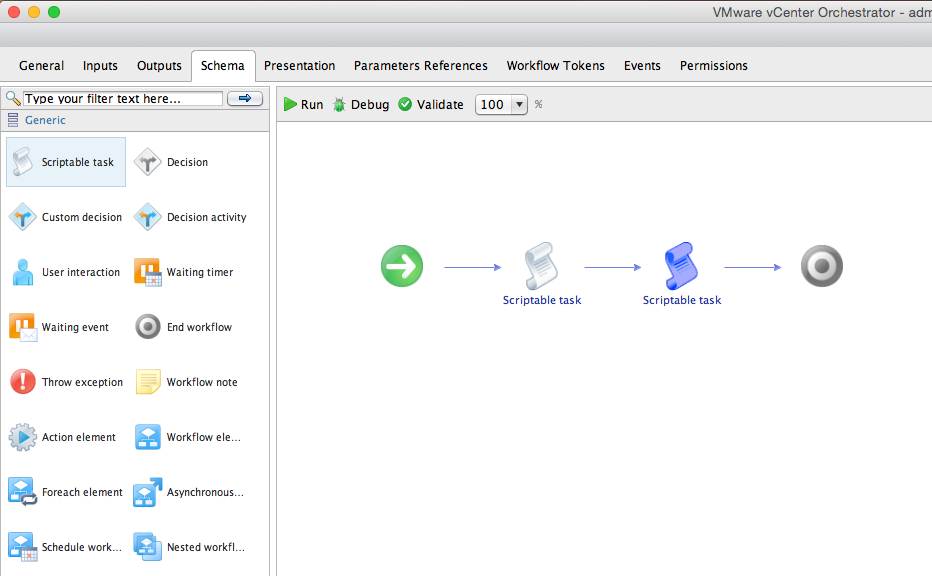
Let me show you how to do this. Drag and drop one more scriptable task just after the original scriptable task:

Screenshot 2015-03-17 15.14.55

This time, drag and drop Datastore from Input Attributes:

Screenshot 2015-03-17 15.15.39

On the second scriptable task, type the following in Scripting field:

System.log(Datastore);
Running it with Cluster defined:
Screenshot 2015-03-17 15.16.46

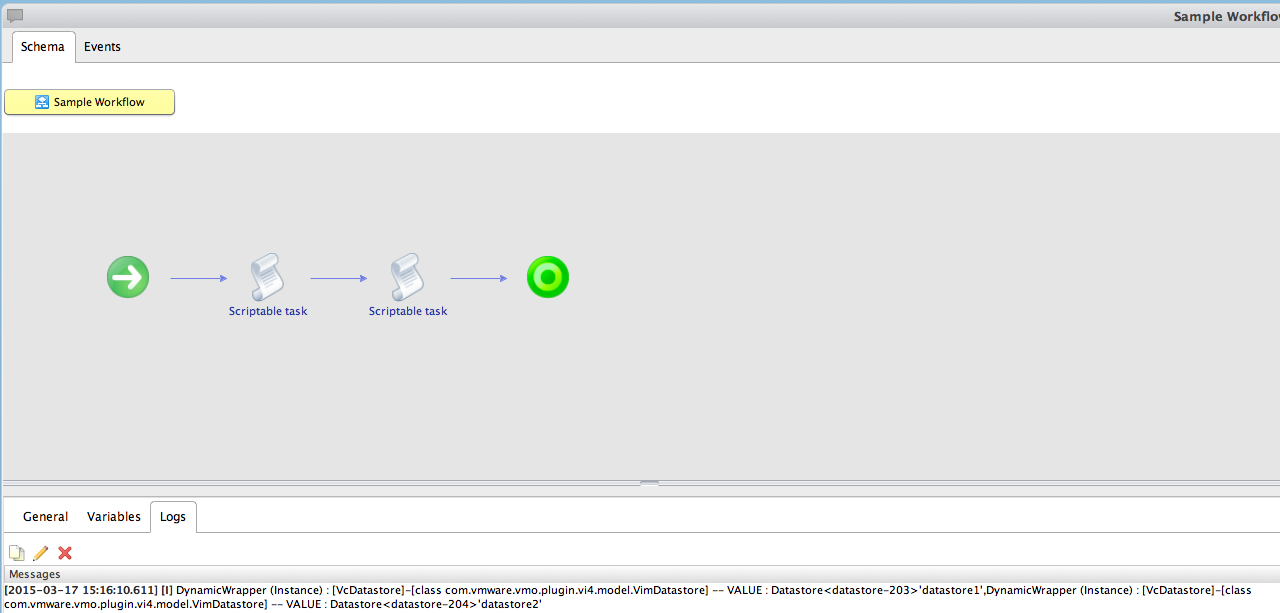
The output is same as last time but the difference now is that:

  • Saved datastore output to Datastore object as an attribute
  • Parsed the attribute to a scriptable task and presented this value

The purpose of this exercise was to make you familiar with attribute as moving on, this will be used most of the time.

Wrap-Up

Hope this series helped and always welcome to leave a reply below or Twitter for any clarifications.

As mentioned in introduction, the next series will be Action & Workflow. Stay tuned!

PowerCLI Report Tip – Part 4

Introduction

Finally, it’s the last PowerCLI Report Tip series! In this blog post, it will be discussing how PLINK could be used for advanced reporting. This will be quite short compared to other blog series and if you want to read previous series, they could be found below:

What is PLINK?

Many of you would already be familiar with SSH client. Putty if you are running Windows or terminal for Mac. PLINK is a command-line interface to the PuTTY back ends. More information could be found and downloaded here.

Why PLINK with PowerCLI?

Normally, PowerCLI would be enough for reports with information from vCenter Server and ESXi server. However, sometimes, reports will require additional information from external sources. I will explain reasons in Examples section.

How do you run PLINK with PowerCLI?

Running PLINK with PowerCLI is quite simple:

  1. Download the file
  2. Locate it under a folder
  3. Run

Example attached below:

PowerCLI C:\script\plink> .\PLINK.EXE
PuTTY Link: command-line connection utility
Usage: plink [options] [user@]host [command]
("host" can also be a PuTTY saved session name)
Options:
  -V        print version information and exit
  -pgpfp    print PGP key fingerprints and exit
  -v        show verbose messages
  -load sessname  Load settings from saved session
  -ssh -telnet -rlogin -raw -serial
            force use of a particular protocol
  -P port   connect to specified port
  -l user   connect with specified username
  -batch    disable all interactive prompts
The following options only apply to SSH connections:
  -pw passw login with specified password
  -D [listen-IP:]listen-port
            Dynamic SOCKS-based port forwarding
  -L [listen-IP:]listen-port:host:port
            Forward local port to remote address
  -R [listen-IP:]listen-port:host:port
            Forward remote port to local address
  -X -x     enable / disable X11 forwarding
  -A -a     enable / disable agent forwarding
  -t -T     enable / disable pty allocation
  -1 -2     force use of particular protocol version
  -4 -6     force use of IPv4 or IPv6
  -C        enable compression
  -i key    private key file for authentication
  -noagent  disable use of Pageant
  -agent    enable use of Pageant
  -m file   read remote command(s) from file
  -s        remote command is an SSH subsystem (SSH-2 only)
  -N        don't start a shell/command (SSH-2 only)
  -nc host:port
            open tunnel in place of session (SSH-2 only)
  -sercfg configuration-string (e.g. 19200,8,n,1,X)
            Specify the serial configuration (serial only)

Specifically, you could execute the following to run a command over a server:

C:\script\PLINK\plink.exe -pw "Password of the user" "Username@ServerName" "Command you want to run"

Assuming the connection is successfully made, let’s go through the tips.

Tips, PLINK with PowerCLI

First tip

When you run SSH command to a server for the first time, it asks you to accept the certification like the following:

PowerCLI C:\script\plink> .\PLINK.EXE -pw "Password" "Username@ServerName" "Command you want to run"
The server's host key is not cached in the registry. You have no guarantee that the server is the computer you think it is.
The server's dss key fingerprint is:
ssh-dss 1024 aa:bb:cc:dd:ee:ff:gg:aa:bb:cc:dd:ee:ff:gg:aa:bb
If you trust this host, enter "y" to add the key to
PuTTY's cache and carry on connecting.
If you want to carry on connecting just once, without
adding the key to the cache, enter "n".
If you do not trust this host, press Return to abandon the connection.
Store key in cache? (y/n)

Instead of typing yes all the time for the first connection, you could simply use “echo” to avoid it. Use the following:

echo y | C:\script\PLINK\plink.exe -pw "Password of the user" "Username@ServerName" "Command you want to run"

Second tip

When you save an output from PLINK to a PowerCLI variable, formatting it is not straightforward. Let’s have a look at example. Below is an output from Dell Remote Access Control (DRAC):

PowerCLI C:\script\plink> .\PLINK.EXE -pw ""root@10.10.10.1" "racadm getniccfg"
IPv4 settings:
 NIC Enabled = 1
 IPv4 Enabled = 1
 DHCP Enabled = 0
 IP Address = 10.10.10.1
 Subnet Mask = 255.255.255.0
 Gateway = 10.10.10.254
IPv6 settings:
 IPv6 Enabled = 0
 DHCP6 Enabled = 1
 IP Address 1 = ::
 Gateway = ::
 Link Local Address = ::
 IP Address 2 = ::
 IP Address 3 = ::
 IP Address 4 = ::
 IP Address 5 = ::
 IP Address 6 = ::
 IP Address 7 = ::
 IP Address 8 = ::
 IP Address 9 = ::
 IP Address 10 = ::
 IP Address 11 = ::
 IP Address 12 = ::
 IP Address 13 = ::
 IP Address 14 = ::
 IP Address 15 = ::
LOM Status:
 NIC Selection = Dedicated
 Link Detected = Yes
 Speed = 100Mb/s
 Duplex Mode = Full Duplex

Let’s say you would like to pull out network settings, i.e. IP address/Subnet Mask/Gateway, how could we pull only three elements out? First of all, save the output to a variable:

PowerCLI C:\script\plink> $output = .\PLINK.EXE -pw ""root@10.10.10.1" "racadm getniccfg"

Good news is that the output is saved as an array, not to a single line meaning you could do the following:

PowerCLI C:\script\plink> $output[5]
IP Address = 10.10.10.1
PowerCLI C:\script\plink> $output[6]
Subnet Mask = 255.255.255.0
PowerCLI C:\script\plink> $output[7]
Gateway = 10.10.10.254

Then you could simply use -replace and -split functions to get the information you are after:

PowerCLI C:\script\plink> $output[5] -replace " "
IPAddress=10.10.10.1 

PowerCLI C:\script\plink> ($output[5] -replace " ") -split "="
IPAddress
10.10.10.1

PowerCLI C:\script\plink> $ipaddress = (($output[5] -replace " ") -split "=")[1]
PowerCLI C:\script\plink> $ipaddress
10.10.10.1

Not a simple way but it’s achievable.

Let’s take a look at another example. This time, it’s an output from IBM SVC:

PowerCLI C:\script\plink> .\PLINK.EXE -pw "Password!" "UserName@ServerName" "lsvdisk"
id name             IO_group_id IO_group_name status mdisk_grp_id mdisk_grp_name capacity type    FC_id FC_name RC_id RC_name vdisk_UID                        fc_map_count copy_count fast_write_state se_copy_count RC_change compressed_copy_count
0  vDisk1           0           io_grp0       online 0            MDISK1         1.00TB   striped                             6005076812345678A000000000000000 0            1          not_empty        0             no        0
1  vDisk2           0           io_grp0       online 1            MDISK2         1.00TB   striped                             6005076812345678A000000000000003 0            1          empty            0             no        0

Referring to the output, it won’t be as easy as the first example since the elements are separated with spaces that varies.

Thinking about the SVC command, it has the parameter to output with delimiter, i.e. CSV output:

PowerCLI C:\script\plink> .\PLINK.EXE -pw "Password!" "Username@ServerName" "lsvdisk -delim ,"PowerCLI C:\script\plink> output.csv
id,name,IO_group_id,IO_group_name,status,mdisk_grp_id,mdisk_grp_name,capacity,type,FC_id,FC_name,RC_id,RC_name,vdisk_UID,fc_map_count,copy_count,fast_write_state,se_copy_count,RC_change,compressed_copy_count
0,vDisk1,io_grp0,online,0,MDISK1,striped,,,,,6005076812345678A000000000000000,0,1,not_empty,0,no,0
1,vDisk2,io_grp0,online,1,MDISK2,striped,,,,,6005076812345678A000000000000003,0,1,empty,0,no,0

Why would you want to output with delimiter “,”? The reason is simple, PowerCLI has CSV function Import-CSV and using this, formatting the output will be quite easy:

  1. > to save the output as a CSV file
  2. Then, run Import-Csv
PowerCLI C:\script\plink> $output > test.csv
PowerCLI C:\script\plink> Import-Csv .\test.csv

Now, you will see formatted output:

id                    : 0
name                  : vDisk1
IO_group_id           : 0
IO_group_name         : io_grp0
status                : online
disk_grp_id           : 0
mdisk_grp_name        : MDISK1
capacity              : 1.00TB
type                  : striped
FC_id                 :
FC_name               :
RC_id                 :
RC_name               :
vdisk_UID             : 6005076812345678A000000000000000
fc_map_count          : 0
copy_count            : 1
fast_write_state      : not_empty
se_copy_count         : 0
RC_change             : no
compressed_copy_count : 0

id                    : 1
name                  : vDisk2
IO_group_id           : 0
IO_group_name         : io_grp0
status                : online
mdisk_grp_id          : 1
mdisk_grp_name        : MDISK2
capacity              : 1.00TB
type                  : striped
FC_id                 :
FC_name               :
RC_id                 :
RC_name               :
vdisk_UID             : 6005076812345678A000000000000003
fc_map_count          : 0
copy_count            : 1
fast_write_state      : empty
se_copy_count         : 0
RC_change             : no
compressed_copy_count : 0

This is a way of formatting the output nice and simple. One thing to note is that it will save the output to your local disk, e.g. C drive. I suggest you to delete the file once you save it to a variable, like this:

PowerCLI C:\script\plink> .\PLINK.EXE -pw "Password!" "Username@ServerName" "lsvdisk -delim ,"PowerCLI C:\script\plink> output.csv
PowerCLI C:\script\plink> $output = Import-Csv output.csv
PowerCLI C:\script\plink> Remove-Item output.csv

Time to go through examples.

Example 1

I already wrote a blog post Virtual Machines running on vDisks in relationships. The purpose of this report was to find which virtual machines are mapped with VMFS volumes that are in Metro Mirror relationship, i.e. synchronous replication. Why would you need PLINK for this?

Even though the naming convention across VMFS volumes is solid to represent which ones are in relation, administrators make mistakes. Meaning that if there are VMFS volumes with wrong naming convention, then the report will not be accurate. Hence, I decided to match against UID so the report is 100% right! For more information, refer to the link attached above.

Example 2

To check custom services running on ESXi servers:

PowerCLI C:\script\plink> Get-VMHostService -VMHost (Get-VMHost -Name "ESXi.test.com")
Key Label Policy Running Required
--- ----- ------ ------- --------
DCUI Direct Console UI on True False
TSM ESXi Shell off False False
TSM-SSH SSH on True False
lbtd lbtd on True False
lsassd Local Security Authenticati... off False False
lwiod I/O Redirector (Active Dire... off False False
netlogond Network Login Server (Activ... off False False
ntpd NTP Daemon on True False
sfcbd-watchdog CIM Server on True False
snmpd snmpd on False False
vmware-fdm vSphere High Availability A... off False False
vprobed vprobed off False False
vpxa vpxa on True False
xorg xorg on False False

How about if there is a custom VIB installed, for example HP AMS and want to check the status? Unfortunately, Get-VMHostService won’t show this.

The way of checking the status is, SSH to ESXi directly and run /etc/init.d/hp-ams.sh status:

PowerCLI C:\script\plink> .\PLINK.EXE -pw "Password!" "Username@ESXiServer" "/etc/init.d/hp-ams.sh status"

Wrap-Up

Hope the PowerCLI Report Tip series helped and in near future, I will come back with PowerCLI automation tips.

As always, feel free to leave a comment for any clarifications.