Introduction
This is the second vRO deep dive series, where I will be discussing action and workflow. I recommend you to read the first series before going through this post.
I will first start with action and then workflow.
Action
What is Action? Simple way of describing is, think it as a scriptable task that you can load anywhere which is saved in modules (module is equivalent to folder). It’s totally a personal preference to use either a scriptable task or action but if it’s a task that could be used in multiple workflows i.e. repeatable task, it would be easier to save it as an action and call it from workflows.
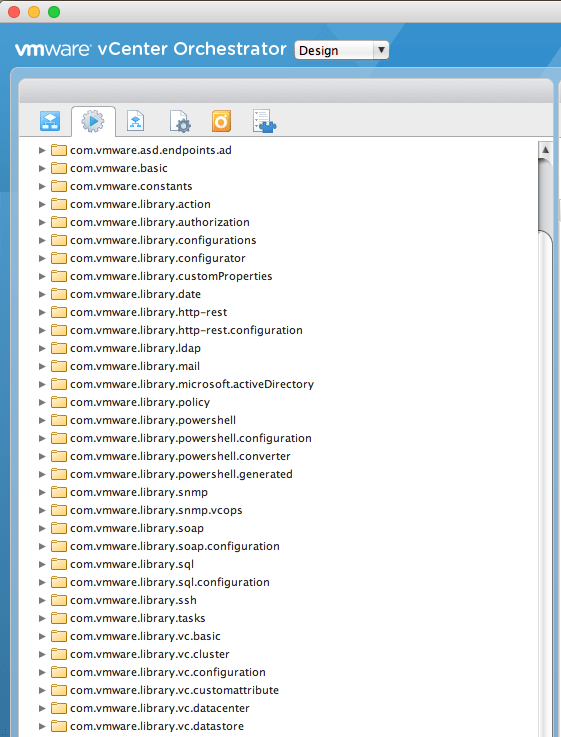
Let’s do an exercise to see what action is. I will be creating an action and re-calling last series’ example. Navigate to Design section and go to Action’s tab:

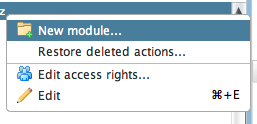
Right-click on the root folder and create a module. You could call it anything but in my case, I named it as org.company.test:
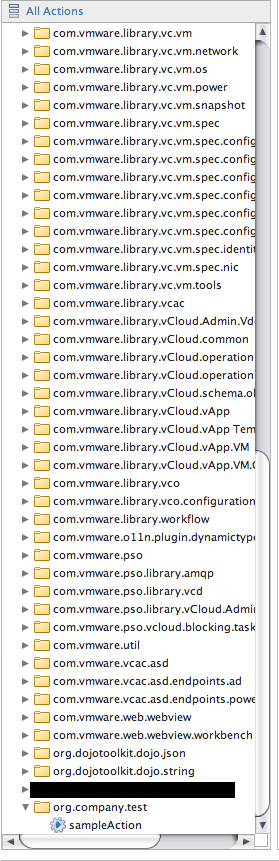
Right click on the created module, click Add Action and name it sampleAction:


Right click on the created action, Edit and navigate to Scripting tab:

You will then see a space similar to a scriptable task. On top of the scripting area, you could define multiple inputs and only one output. This is the main difference between a scriptable task and an action, only one output could be defined.
Let’s continue, click on Add Parameter and create 2 input parameters as below:
- VM with VC:VirtualMachine Type
- Cluster with VC:ClusterComputeResource Type


On the scripting area below, copy and paste the following in:
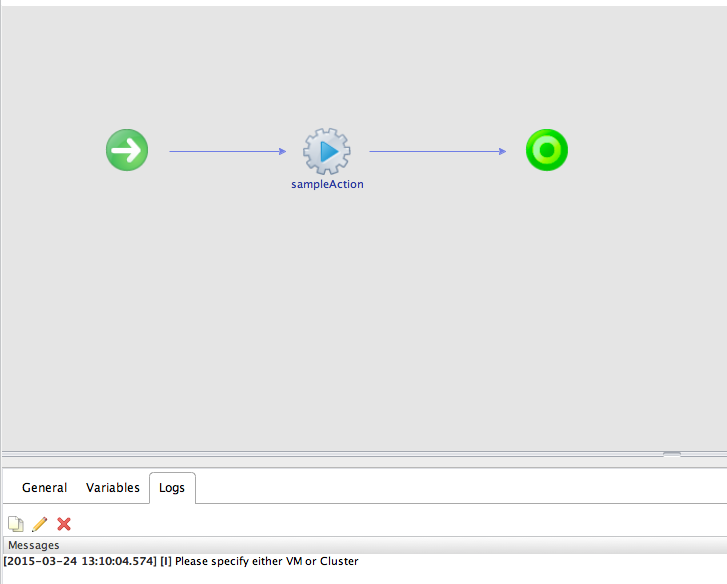
if (VM && Cluster) {
    System.log("Please specify either VM or Cluster");
} else if (Cluster) {
    System.log(Cluster.datastore);
} else if (VM){
    System.log(VM.datastore);
}

Click Save and Close and you will see sampleAction saved in the module you created:
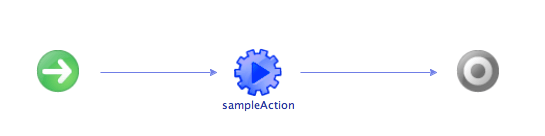
Let’s replace previous Sample Workflow with the action we just created. Delete everything within the Sample Workflow built last time and drag & drop the action built between start and end:
Click Edit on the workflow to finish off the Visual Binding:

One thing to note is that Scripting tab won’t show you the full details, it’s a pre-generated command which simply loads the action:

Let’s run the workflow! Same as last time, I will cover 2 scenarios:
- VM or Cluster only
- VM and Cluster
Defining VM only:


Giving values to both VM and Cluster:
In this exercise, we’ve replaced a scriptable task to an action. Instead of using the action itself like above, you could call the action from a scriptable task. Let’s try it. Edit the Sample Workflow, delete the action and put a scriptable task in between instead:

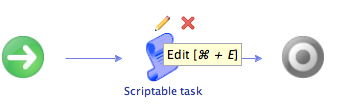
Edit the scriptable task and complete the Visual Binding:

Type the following on the Scripting tab:
System.getModule("org.company.test").sampleAction(VM,Cluster);
Save and Close then run it. Same as above, I only defined VM for the input:

This exercise was to show that an action could be called from a scriptable task. Some of you might ask “why would you load an action from a scriptable task, why not just action”? Let me explain it.
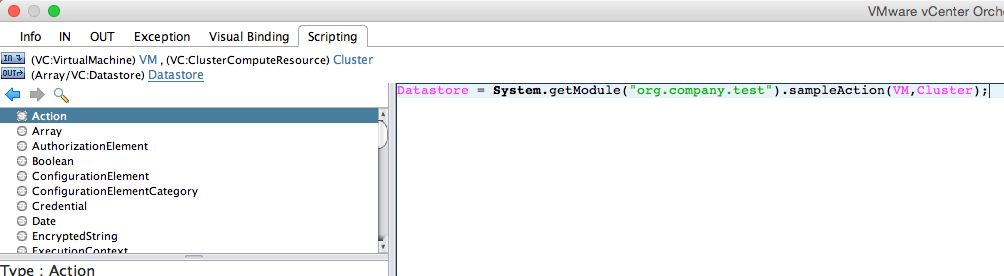
Go back to the action created under org.company.test module, edit and navigate to scripting tab:

Take a close look at “Return type : void”. What does it mean? As mentioned earlier, action could return only 1 output and this is where you set type for an output. Click on void and select VC:Datastore as type:

For the script below, change it to the following:
if (VM && Cluster) {
    System.log("Please specify either VM or Cluster");
} else if (Cluster) {
    return Cluster.datastore;
} else if (VM){
    return VM.datastore;
}

From now on, this action will return datastore object which could be saved to an output attribute within a workflow.
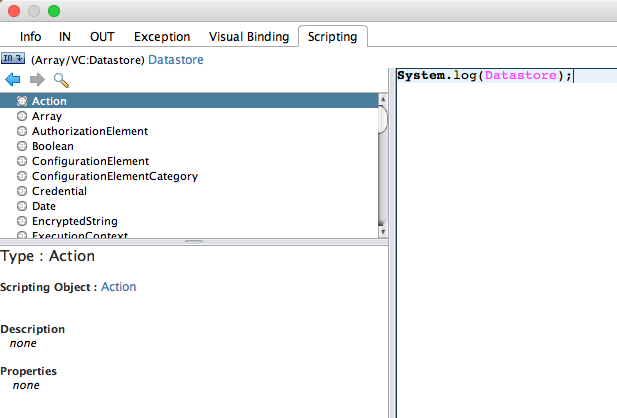
Save and Close the action and go back to Sample Workflow. Edit the scriptable task and drag & drop Datastore attribute to this:

As the action returns VC:Datastore object, you could simply do the following to save the result from the action to a variable:
Datastore = System.getModule("org.company.test").sampleAction(VM,Cluster);
System.log(Datastore);
Running the workflow:

In summary, I have gone through:
- Using an action within the workflow
- Calling an action from a scriptable task
- Saving an output from an action in a scriptable task and map it to an output attribute
I will continue with Workflow.
Workflow
In the previous series, I’ve been demonstrating with scriptable tasks only within a workflow. Moving forward, I will be using multiples of different elements that could be used within workflows.
In this section, even though there are lots of other components you could use, will be concentrating on the following only:
- Decision
- Custom Decision
- User Interactive
- Sleep
- Workflow Note
Before wrapping up, I will be providing an exercise to utilise all elements above.
Decision
The decision is normally used to decide if it’s good to proceed or terminate the workflow. Once again, I will be re-calling last series’ example. What I will show you is, the workflow will only output datastore information only if there is/are datastore(s) mapped to a cluster or a VM. Let’s start!
Go back to Sample Workflow and create one more attribute called DatastoreArrayLength with Type number:

DatastoreArrayLength attribute will be calculating the length of Datastore array to verify if it has value or not, i.e. 0 meaning array is empty otherwise, has values.
In the scriptable task, drag & drop DatastoreArrayLength into Output:

Navigate to Scripting and type the following in:

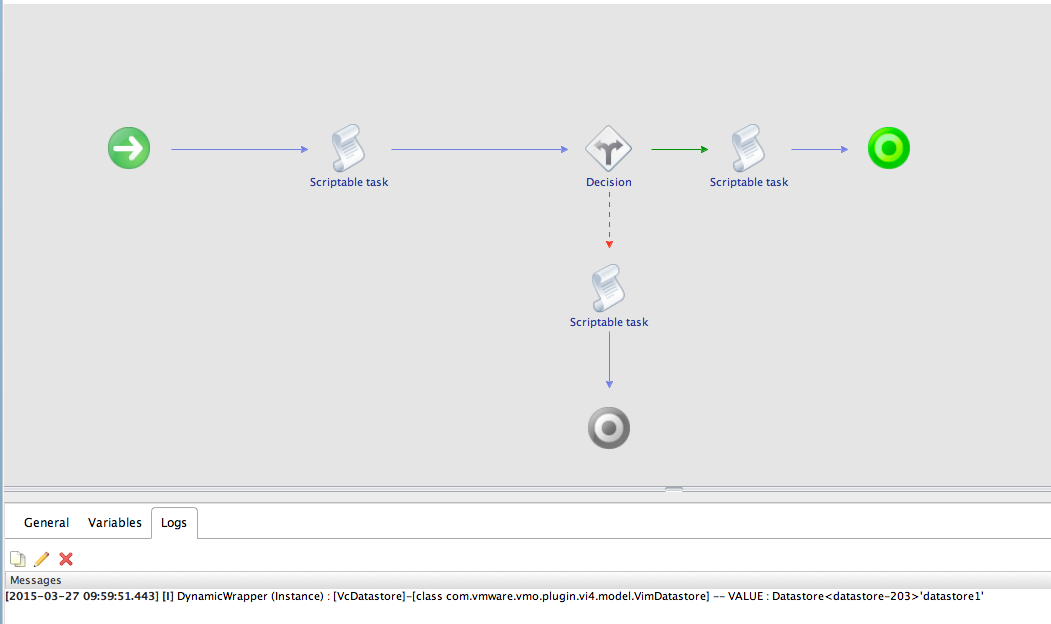
Save and Close scriptable task and drag & drop Decision between the scriptable task and end:
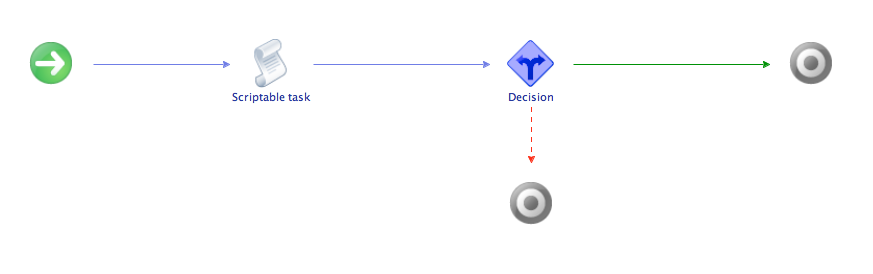
You will then see two arrows:
- The green arrow representing success
- Same as “Return true”
- The red arrow representing failure
- Same as “Return false”
Based on the decision you define, i.e. length of Datastore array, it could go to success end or failure end.
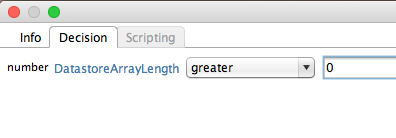
Edit the decision, navigate to Decision tab, click on Not set and select DatastoreArrayLength:

Click on the equals and change it to greater:

As mentioned earlier, the workflow will only continue if the Datastore array isn’t empty. Therefore, type 0.
Once the decision’s made, it would be good to print-out if the process was successful or not. Drag & drop 2 scriptable tasks like the following:

For the success scriptable task, navigate to Visual Binding tab and drag & drop Datastore attribute to input:

Go to Scripting tab and type the following in to output Datastore value:
Save and Close and edit the scriptable task for failure branch. This time, you won’t have to do any Visual Binding as there’s no Datastore found before. You will only require to write the following in the Scripting tab:

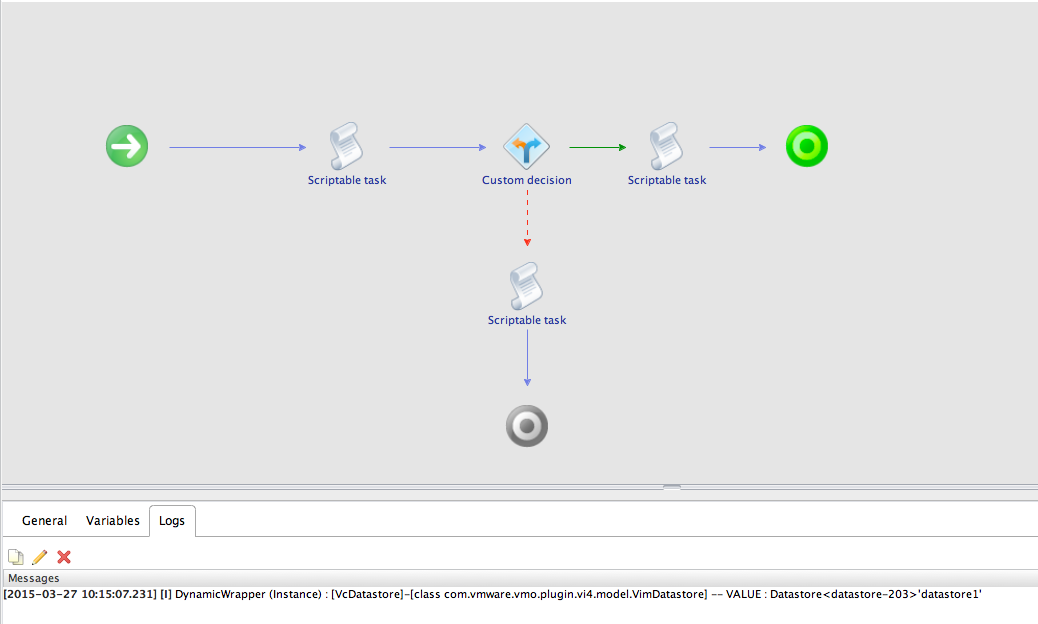
Save and Close and time to run the workflow. I’ve chosen a cluster with 1 datastore attached:
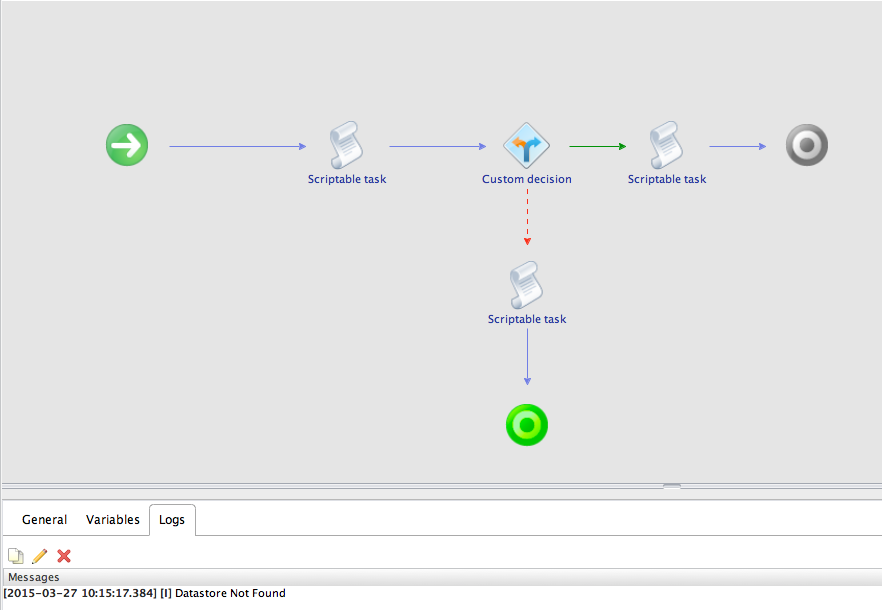
Choosing a cluster with no ESXi servers i.e. no datastores:

Hope this example helped you to understand decision and I will move on to Custom Decision.
Custom Decision
The custom decision is exactly same as decision above but it provides the ability to write a script to make it more richful decision tool. Will repeat the above example replacing decision to custom decision element.
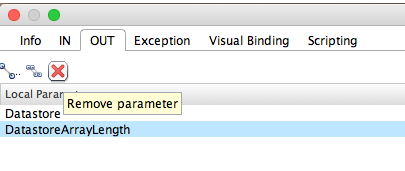
Go back to Sample Workflow and delete the DatastoreArrayLength attribute:

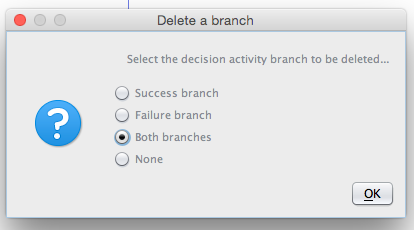
Also delete the Decision created:
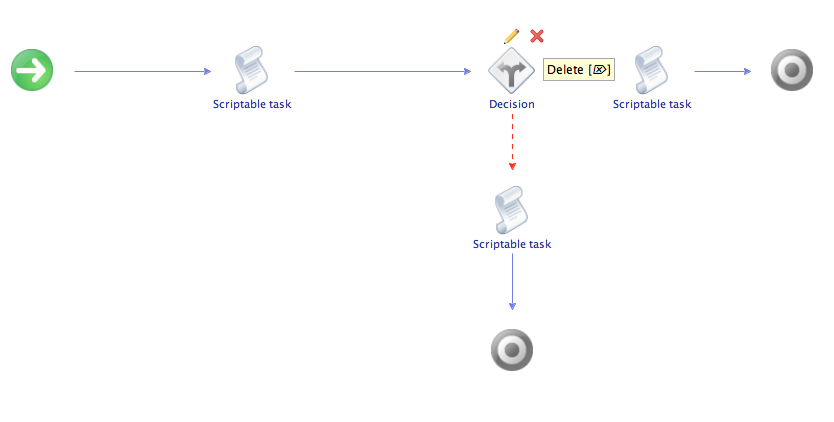
When you delete, it will ask you which branches you want to delete. In this case, as we are planning to replace it to custom decision select Both branches:
Edit the scriptable task and delete output from it:
Also, remove DatastoreArrayLength line:
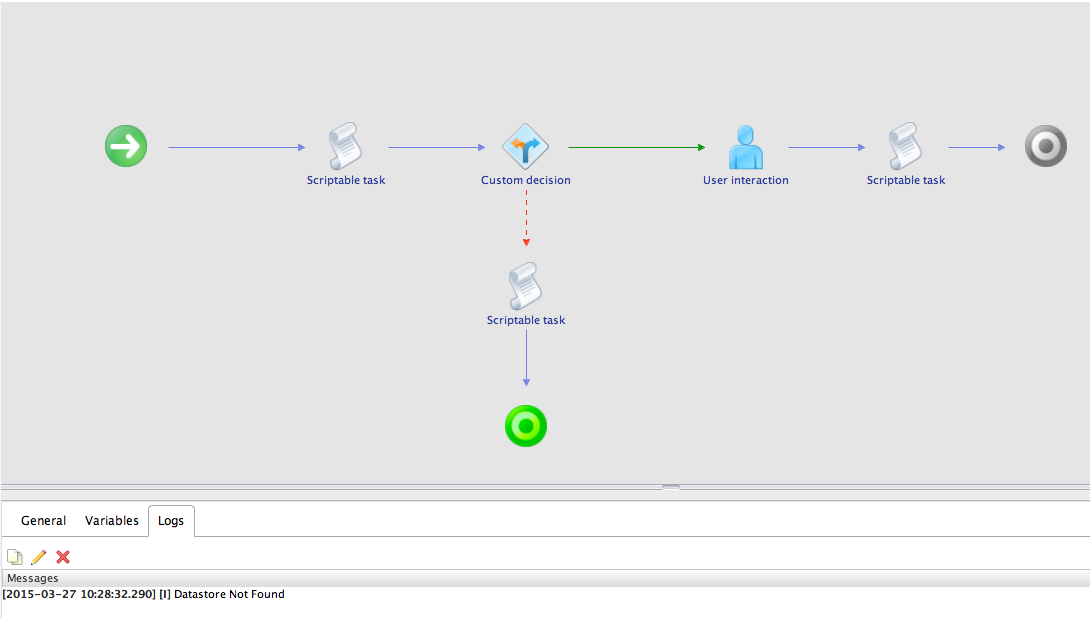
Everything’s back to original scriptable task. Let’s try custom decision, drag & drop custom decision between scriptable task and end:

Edit the custom decision and navigate to IN tab:

Click on “Bind to workflow parameter/attribute” and select Datastore:

Navigate to Scripting tab and type the following in. To add some explanations to the following screenshot, any custom decision’s output is always boolean which is either true or false. Hence, if the length of Datastore array is greater than 0, you must return true as it means the workflow will be successful. Else, return false:

Same as decision exercise, create two scriptable tasks and configure:

Save and Close and running the workflow that the cluster with a datastore mapped:
And the result with a cluster with no datastore:
Literally, decision and custom decision provide same functionally but custom decision is more flexible. One of the examples is that you could actually remove 2 scriptable tasks created that was used to print output and modify the script within custom decision to the following:

Hope this was useful and time to look at User Interaction.
User Interactive
User interactive is used if you want users to specify inputs during workflow processes. I will be using above example again but will change it slightly:
- Specify either Cluster or VM
- User choose 1 datastore from the list of datastores mapped to either Cluster or VM
- Show the detail of the chosen datastore
Let us begin!
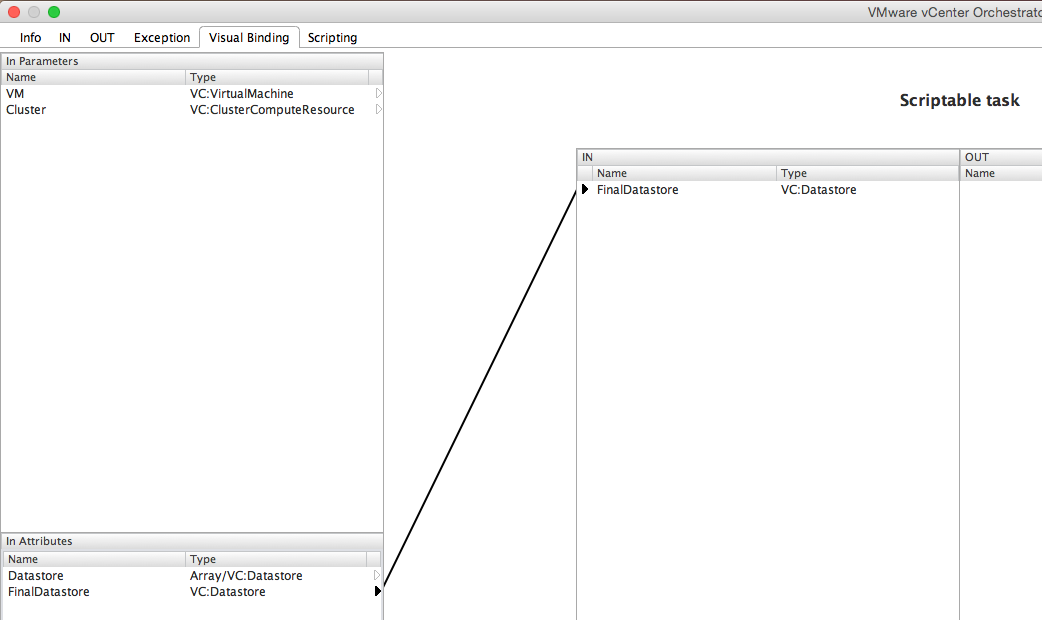
Edit the Sample Workflow and create an attribute FinalDatastore as the following:

This attribute will be used to save the selected datastore by the user. Go back to Schema, delete scriptable task on the successful branch and drag & drop User Interaction:


Edit User Interaction, navigate to External inputs and click “Bind to workflow parameter/attribute”:

Select FinalDatastore attribute defined:

What we’ve just done is that when a user selects a datastore, the value will be saved to this FinalDatastore attribute. Remaining work is to define datastore(s) found to be presented to users. It will require some work on Presentation layer which will be discussed in depth on the next series. For now, follow the instructions below.
Go to Presentation tab, select FinalDatastore and click “Add property”:

Select Predefined list of elements:

Click edit “pencil” button:

Select Datastore as the linked parameter and Accept:

Saving Sample Workflow will cause some issues saying 2 attributes are not set yet. Go back to User Interaction and set the following two parameters to NULL:


I will explain this separately in near future so for now, make them NULL!
Go back to Schema and drag & drop a scriptable task between User Interaction and end. We will want to output the datastore user selected. Edit the scriptable task, do the Visual Binding and type the following script in:

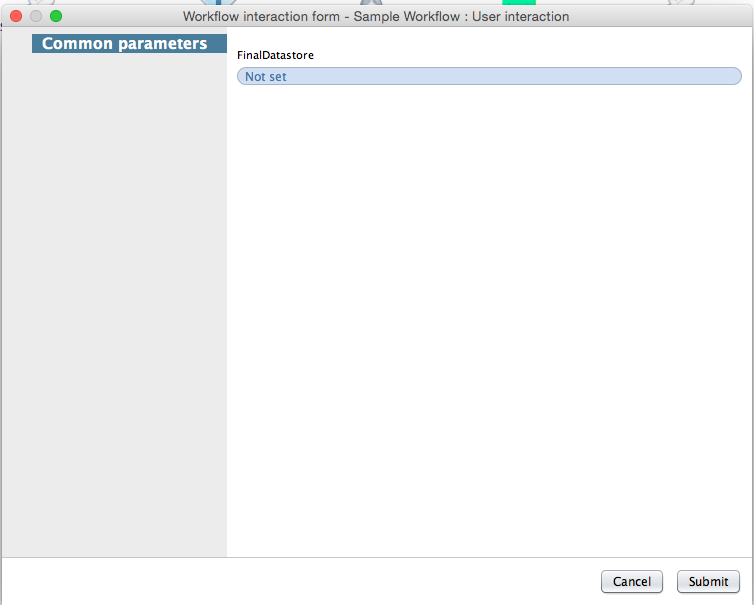
Save and Close and the time has came, let’s execute the workflow! This time, I’ve chosen a cluster with 2 datastores and when the process reaches to User Interaction, it will prompt you a screen like the following:

Click on Not Set and you will see 2 datastores:

I’ve selected datastore11 and it printed out the details of datastore11:

Running the workflow selecting a cluster with no datastores:
This is how you would use User Interaction element and moving on to Sleep.
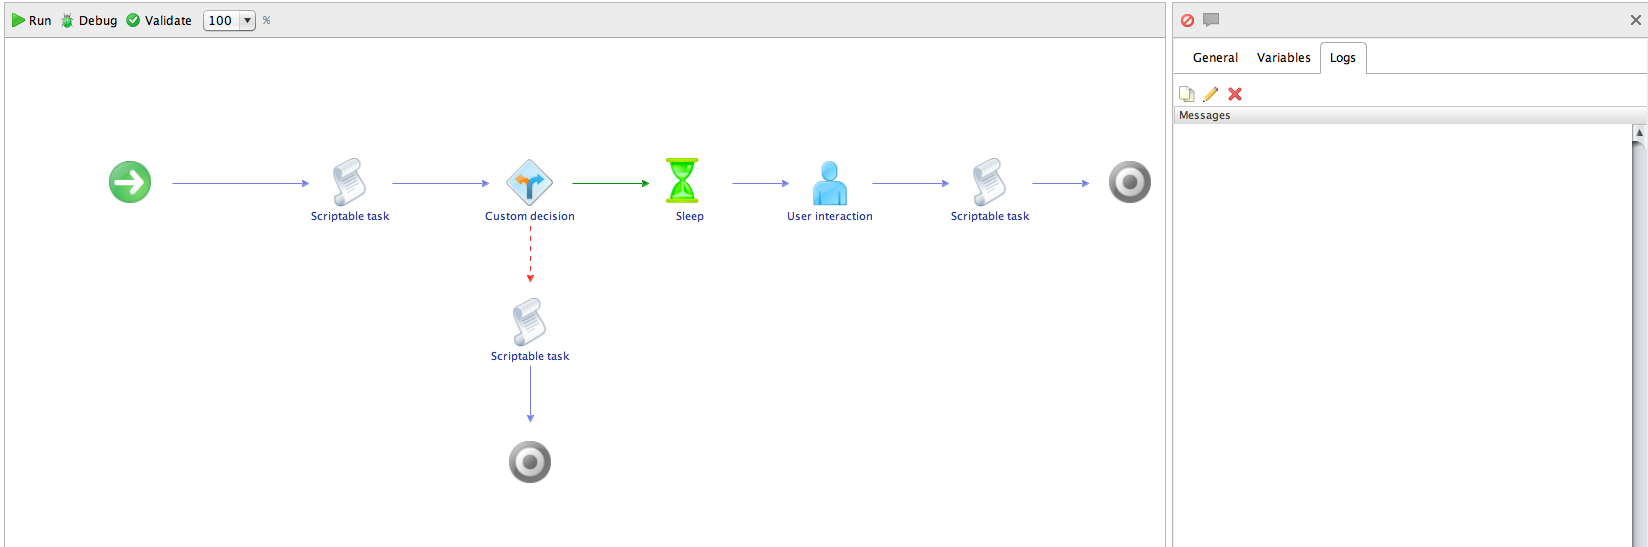
Sleep
Sleep is very simple, literally you are sleeping for x amount of seconds before moving on to next process. Will quickly show you how to use this element.
Edit Sample Workflow, define an attribute called SleepTimer with Type number and give it a value of 10:

Drag & drop Sleep between custom decision and User Interaction:

Edit Sleep element and complete Visual Binding like the following:

Running the workflow, it will sleep for 10 seconds before asking user to select a datastore:
Hope this was straightforward and I will be continuing with last element, workflow notes.
Workflow Notes
Workflow note is used to visually comment the process within a workflow. Let’s take a look at example below, it’s a workflow I wrote to ensure the VM provisioned from vRA is added to proper DRS group in vMSC cluster making sure the uniform access is achieved. From start to end, I highlighted in yellow saying “Find cluster, convert vCAC:VM to VC:VirtualMachine and find/move to DRS group” and highlight in red for outputting error logs and throw exceptions. This way, it will become much easier to debug processes or transfer this workflow to others: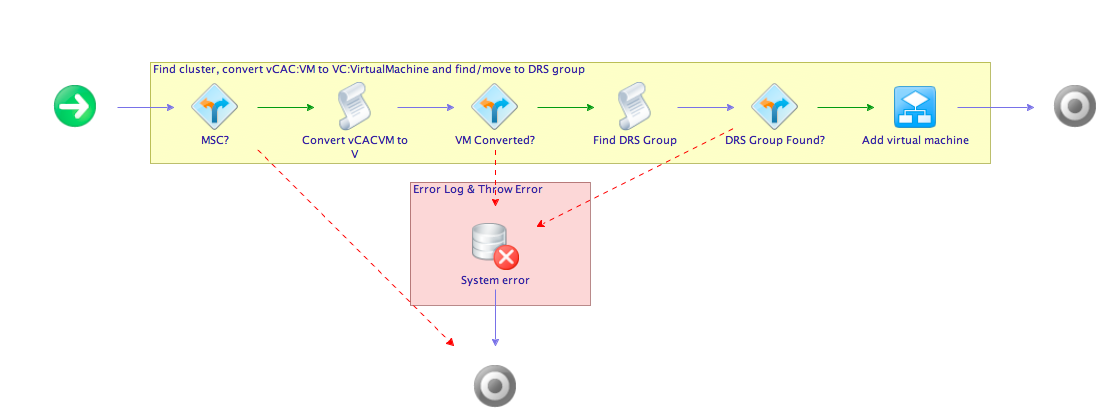
You could change the colour of it to something else, select the workflow note, right click and Edit: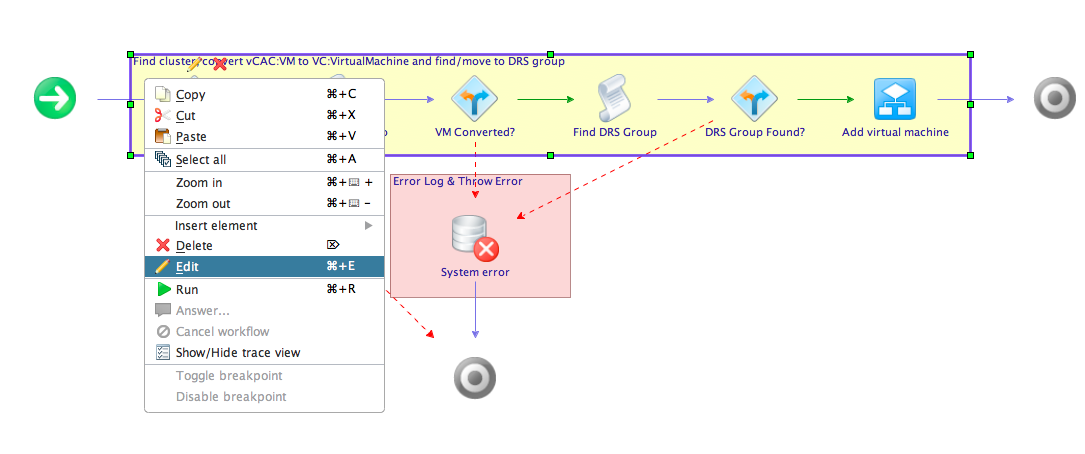
Choose a color and click OK:

Exercise
Prior to this section, the scenario below is an example I came up with. Use it for learning!
Using all elements discussed above, let’s develop a workflow with the sample scenario given below:
Scenario: As part of Windows Server VM decommissioning process, Windows administrator requested VMware team to develop a workflow that:
- Un-join Windows Server from Domain
- PowerShell command provided: “cmd /c netdom remove /d:ssbkang.com SERVER_NAME /ud:ssbkang\ACCOUNT
/pd:PASSWORD” - Service Account provided
- PowerShell command provided: “cmd /c netdom remove /d:ssbkang.com SERVER_NAME /ud:ssbkang\ACCOUNT
- Reboot the VM to make the change above
- If the server was successfully un-joined from domain, power-Off and rename the VM to “Name-Decommission”
Looking at the request from Windows administrator, you will have to:
- Run the command provided within the Windows OS with PowerShell
- Reboot the VM
- If the change is successfully made:
- Power-Off the VM
- Rename the VM
- Else, notify the workflow runner
Let’s take a look at built-in workflows that you could use for this work. On the right hand corner of vRO main page, search with the term “Guest”:
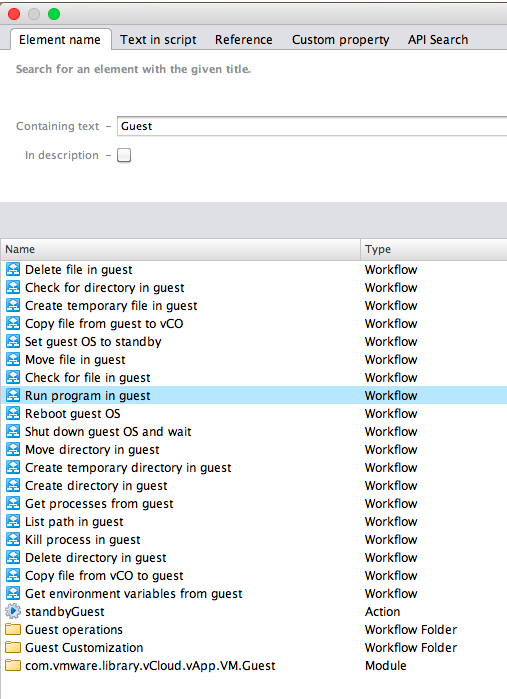
You will then see workflow called “Run program in guest”. Click on Go to Selection and Close the window. Reading the description, looks like you will be able to run PowerShell command with this workflow:

And looking at inputs to this workflow, your decommissioning workflow will require the following inputs:
- Local Administrator / Password
- Name of the VM
And for input attributes of this workflow:
- interactiveSession
- Will be set to false as interaction’s not required
- programPath
- Program path will be PowerShell, which will be “C:\Windows\SysWOW64\WindowsPowershell\v1.0\powershell.exe“
- arguments
- This is the PowerShell script provided, which will be “cmd /c netdom remove /d:ssbkang.com SERVER_NAME /ud:ssbkang\ACCOUNT
/pd:PASSWORD“
- This is the PowerShell script provided, which will be “cmd /c netdom remove /d:ssbkang.com SERVER_NAME /ud:ssbkang\ACCOUNT
- workingDirectory
- This will be set to Null as this isn’t required for this work
- environment
- This will be set to Null as this isn’t required for this work

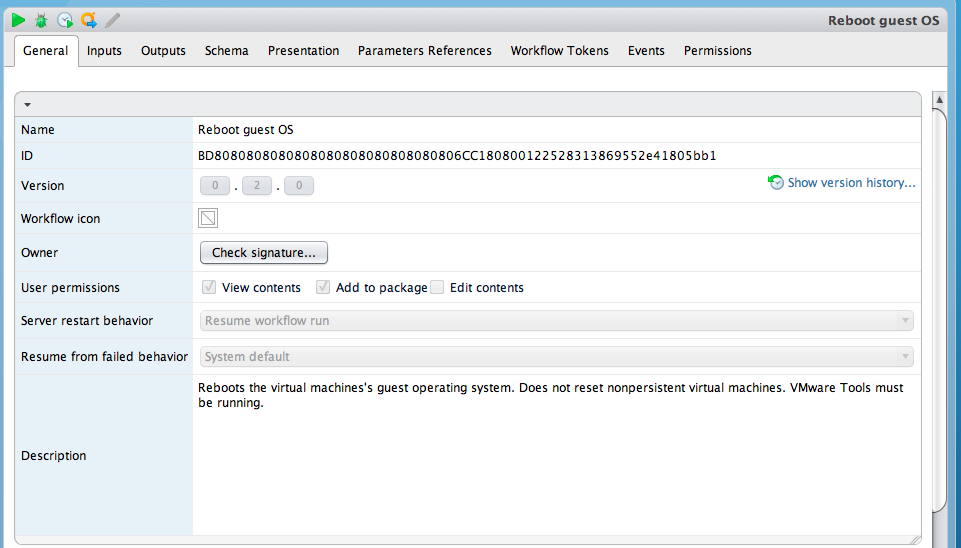
Next bit will be rebooting the VM gracefully. Search for reboot and you will find the following workflow with 1 input called “Reboot guest OS”:


Similar to above, you will be able to find “Shut down guest OS and wait” and “Rename virtual machine”:


Assembling all the information above, we’re ready to start building a workflow. First of all, create a workflow and call it something like “Decommission Windows Server” and create required attributes and inputs as per below:
Attributes:
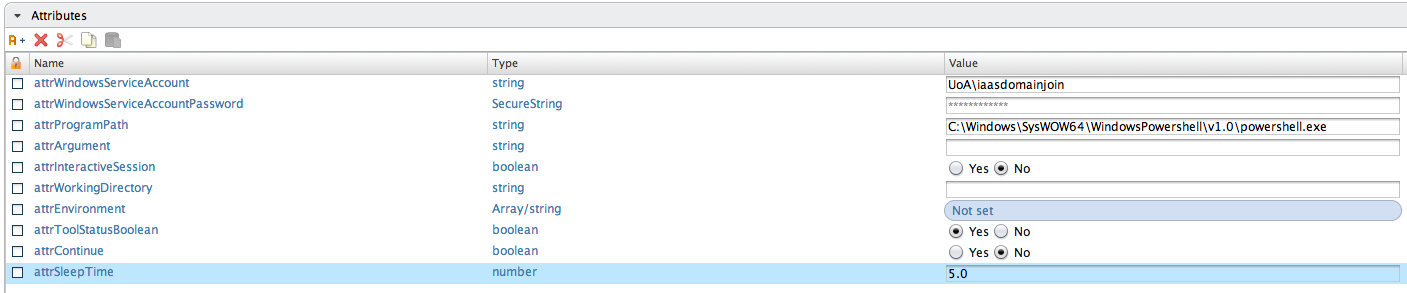
Inputs:

Everything’s prepared, let’s start working on Schema. Collecting above workflows, attributes and inputs, the schema I came up with looks like the following:

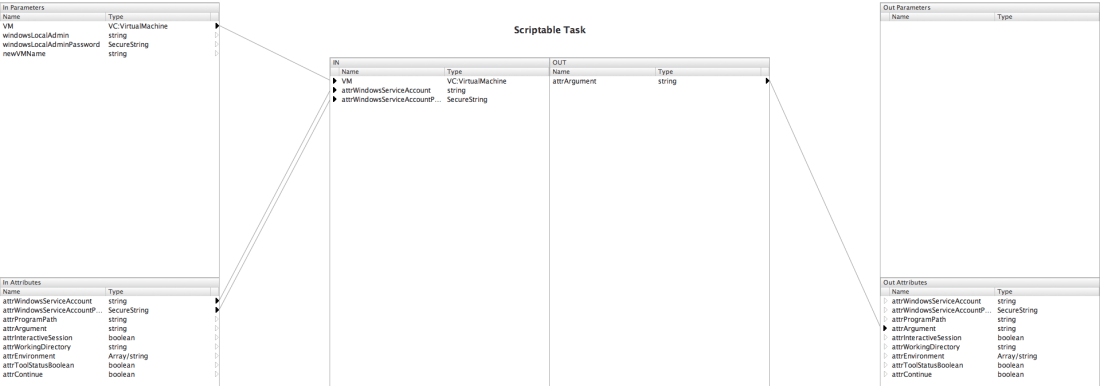
First scriptable task creates an argument which will be saved as an output attribute that will be parsed to “Run Program in guest workflow”:
attrArgument = "cmd /c netdom remove /d:ssbkang.com " + VM.name + " /ud:" + attrWindowsServiceAccount + " /pd:" + attrWindowsServiceAccountPassword

System.log("Argument: " + "cmd /c netdom remove /d:ssbkang.com " + VM.name + " /ud:" + attrWindowsServiceAccount + " /pd:" + "**********");

And the Visual Binding:
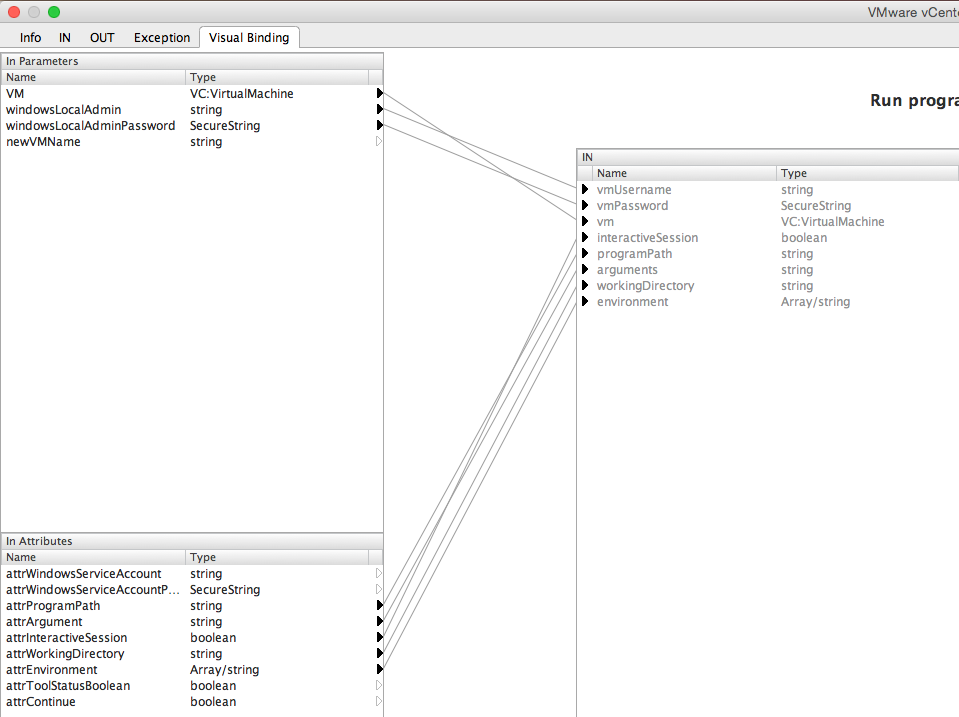
With the argument defined above, it runs “Run program in guest”:
Once the command is ran within the guest OS, I used sleep for 5 seconds before restarting the VM.
After 5 seconds, reboots guest OS. Visual Binding will be:

Once “Reboot guest OS” workflow is executed, I wrote a script to check if the server was un-joined from domain and it is attached below:

var state = "on";
var expression = new RegExp("SSBKANG.COM","i");

System.log("Current hostname is: " + VM.summary.guest.hostName);

while (attrToolStatusBoolean) {
    if (VM.guest.toolsRunningStatus === "guestToolsNotRunning" && state === "on") {
        state = "off";
    }

    if (VM.guest.toolsRunningStatus === "guestToolsRunning" && state === "off") {
        System.sleep(60000);
        System.log(VM.name + " has rebooted and the current hostname is: " + VM.summary.guest.hostName);

        if ((VM.summary.guest.hostName).match(expression)) {
            System.log("Computer " + VM.name + " was not un-joined from Domain, please check");
                attrContinue = false;
        } else {
            System.log("Computer " + VM.name + " was successfully un-joined from domain");
            attrContinue = true;
        }
        attrToolStatusBoolean = false;
    }
}
To briefly explain the script above, I used a while loop with a boolean attribute defined attrToolStatusBoolean that will be checking the status of VMware tools to ensure the guest OS was rebooted and then get the latest hostname. While VM is restarting, VM.guest.toolsRunningStatus becomes “guestToolsNotRunning” status and once the server is up, VM.guest.toolsRunningStatus changes to “guestToolsRunning”. I then sleep for 1 minute to make sure the VMware tools updates the information that in this case is the hostname. It will then get the hostname VM.summary.guest.hostName to find out if the server was un-joined from domain. If it was un-joined, the hostname will be the name of the VM itself returning true otherwise, it will still be VM name + domain returning false. Feel free to use this function for your personal usage if needed 😀
The Visual Binding:

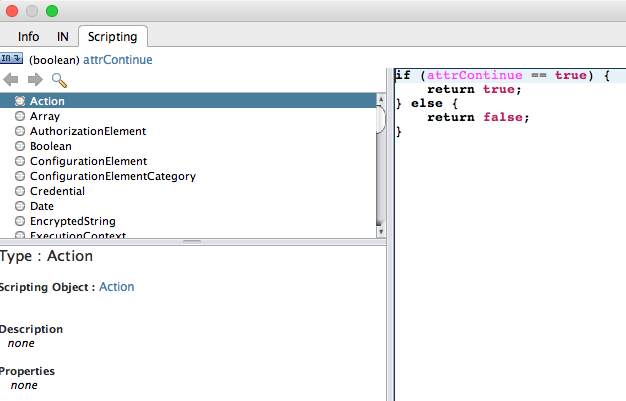
Based on the result from this scriptable task, if the server was un-joined from domain then it will re-name the VM. Otherwise, it will finish the workflow:
Visual Binding of “Rename virtual machine”:

And for the last step, drag & drop Workflow note to briefly explain what the workflow does, example attached below:

Time for testing! I deployed a Windows 2012 Server that’s currently joined to a domain. Screenshots attached below:


Time to run the workflow. Fill in the required information and click run:
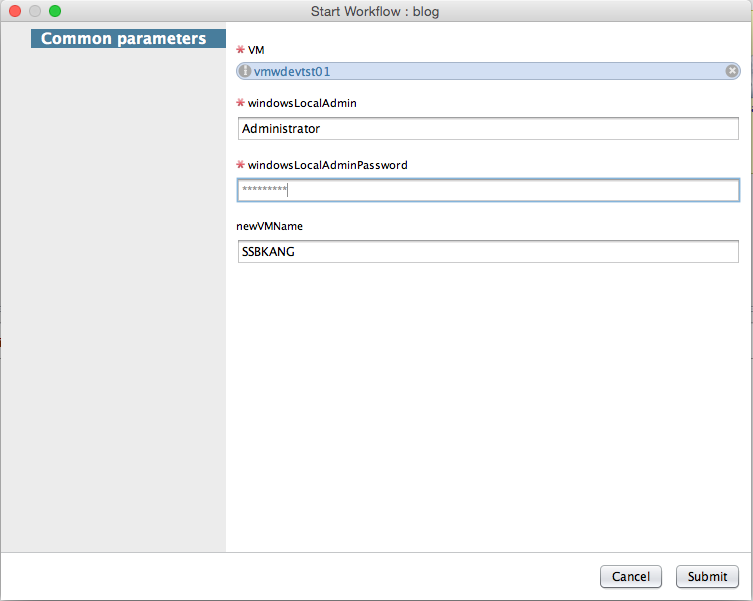
Logging into vCenter Server, you will then see tasks ran by com.vmware.orchestrator user:

The VM is re-named assuming the server was un-joined from domain:

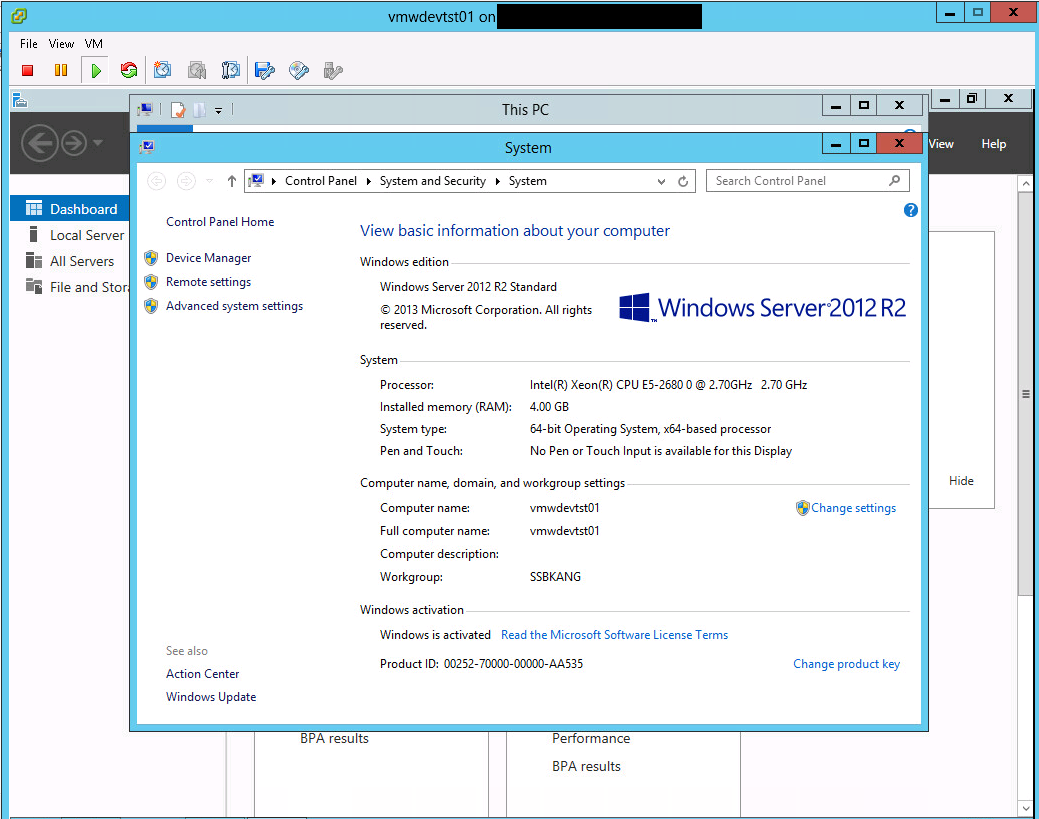
Logging into Windows Server, the server was un-joined from domain!

Wrap-Up
Hope this series was helpful for you to understand action & workflow and for the next series, I will come back with Presentation Layer. Stay tuned 😀

I just tried, but “virtualmachine.summary.guest.hostName” only returns computer name, it’s not full name. It always show without domain name. How you get it work?
Hi Wu,
Could you make sure VMware tools is installed and confirm the FQDN is shown on the VM?
Regards,
Steven.
Yes, I checked that. I use vRO 6.2. Probably some different. I use AD plugin around it.
Ah – the vRO used for this blog is 5.5, will try the latest version in near future and let you know.
Hi SSBKANG,
I really liked the way you have explained vRO.
amit
in one of your images, it has system.warning, I got an error. I found in the docs it’s system.warn passing along, ignore my error posted earlier.
Hi Steve,
Sorry for the late reply.
My bad, it should be system.warn not system.warning. Thanks a lot for picking it up!
Regards,
Steven.
I’m enjoying go through the lessons. I’ve been a scripter for years, learning a tool is challenging. I like the outline of your blog series, it’s helping me get into vRO 7. I’ve not run into any other errors….Great job! I look forward to doing the other lessons.
Glad that you are learning from my blog.
Please do let me know if you want anything from my end, happy to help!
do you mind removing the error comment?
Not at all, done!
I finished up the how-to. Helped it didn’t hand hold too much and made me work through, troubleshooting. Few questions.
1) I had to add /force to unjoin the domain since my user is not a domain admin
2) The unjoin command uses a built-in workflow, the return value was 1680 instead of 0. Do you know where a list of return codes from the SDKConnection object?
Again, good job on the tutorial. I’m still a newbie and hopefully doing a few of these lessons will help sharpen my vRO skills.
Hi Steve
Thanks a lot for pointing out /force switch – I should have thought about a normal user un-joining a server from domain.
Un-join is achieved by “”cmd /c netdom remove /d:ssbkang.com ” + VM.name + ” /ud:” + attrWindowsServiceAccount + ” /pd:” + attrWindowsServiceAccountPassword” command through PowerShell – it is not a built-in workflow. You could think it as running a command over SSH. The return codes should available online I guess. Let me know if you can’t, I will have to take a look.
Thanks!